Learn To Use Metallic Threads For Machine Applique
Designer Deborah Louie explains how to use metallic threads for machine applique and play around with decorative stitches.
Written by Deborah Louie
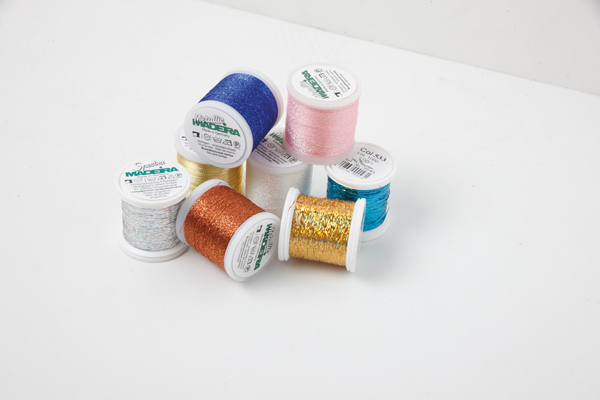
I love machine applique and playing with my decorative stitches. I use the stitches with both their default settings and also adjust them to really push the pattern to its limits for special effects. To date, I have mostly used cotton, polyester, silk and rayon threads on my work, all with splendid results. Thanks to Hobbysew, I was given a box of metallic threads to see what I thought.
Years ago I used a polyester gold thread instead of a metallic gold thread for machine work as I found the metallic difficult to use in the machine. The polyester didn’t have the same shine that the metallic had, but it was strong and did not constantly break while stitching.
So I have been hesitant to try metallic threads again, but with the advances in thread technology in recent years, I thought it was time to give them a good work out again. I am so glad I did — I had a lot of fun experimenting.
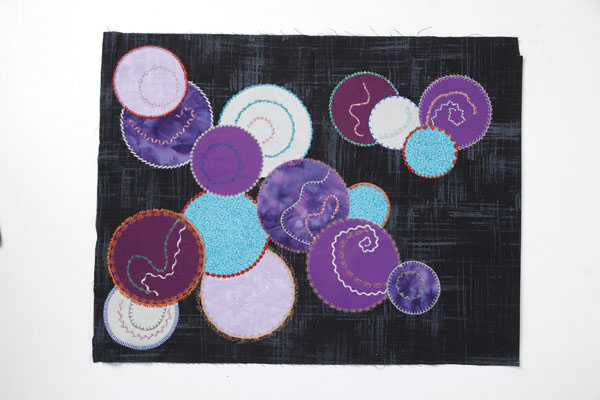
I have put them to the test while making this circular, interlocking modern appliqué block. To make the block I used size fabrics for the circles — four purples, one turquoise and one grey, on a textured black print background. I cut squares of fusible web roughly 8in and ironed them to the wrong side of the six fabrics.
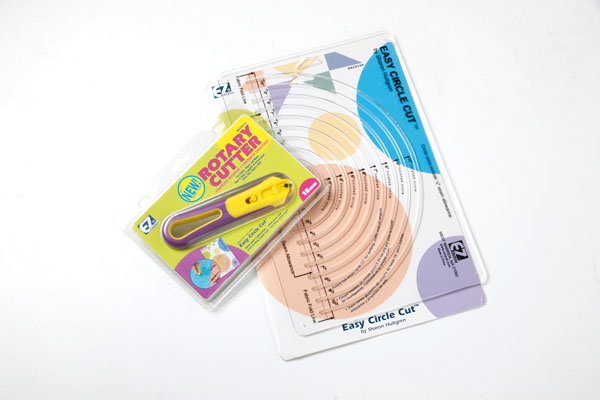
I used the EZ Quilting Easy Circle Cut plastic template from which you can rotary cut circles and half circles ranging from 2in to 10in. I chose circles of two, three and four inches for this project. The template has slits inside where the EZ Quilting rotary cutter with its high-profile blade fits inside the groove.
It’s very easy to use. For full circles, fold the fabric (with fusible web attached) in half and place the fold on the dark fold line on the ruler. Choose the size you are after and then, starting at one side, slowly cut in that groove with the rotary cutter. Hey presto! Perfect circles!
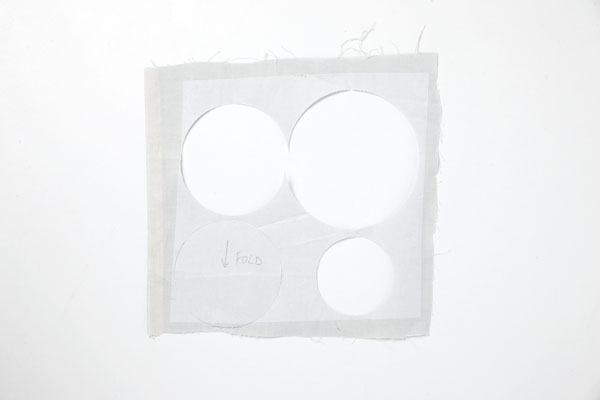
I cut 16 circles out of the six fabrics and then removed the paper backing from the circles and ironed them into a pleasing arrangement. Then I applied a strong stitch and tear stabiliser sprayed onto the wrong side of the fabric with 505 basting spray and I was ready to start appliquéing.
Without stabiliser, the stitches will not be supported and will not lay flat on the fabric, causing puckering. This can also happen if the stabiliser is too light.
I filled the bobbin with white bobbin fill thread (which is what I use for my other machine appliqué). This is a fine polyester that does not bulk up the stitches. I used a Bernina 720 sewing machine that has a throat stitch width of 5.5mm.
I used two attachable machine feet while appliquéing — an open toe embroidery foot which works for all patterns on the machine that have a stitch that sits either to the left- or right-hand side.
This way I can guide the fabric to the edge of the foot every time. The other foot I used was a plastic base foot #34 (reverse-pattern foot with clear sole) which has a centre line marked.
This allows patterns that go left and right of the centre position of the needle to be placed easily on the fabric’s edge. These types of attachable feet are available for most brands of sewing machine or they can be purchased as optional extras.
I used a brand-new size 80 metallic needle. A metallic needle has a large eye that stops the thread heating up and shredding while going through the needle. Using this needle saves frustrating breaks and, in my case, lots of anger!
When I am decorative stitching I always have some spare fabric and stabiliser, a test piece, and stitch out every stitch before I work on my projects. I tend to write the number of the stitch on the fabric just in case I really liked the design and want to use it again, perhaps with a different-coloured thread.
I try the default setting on the machine first, then perhaps play around, adjusting the width and the length for different results. You don’t have to use what the manufacturer of your machine sets for the width and length; see what your machine can do.
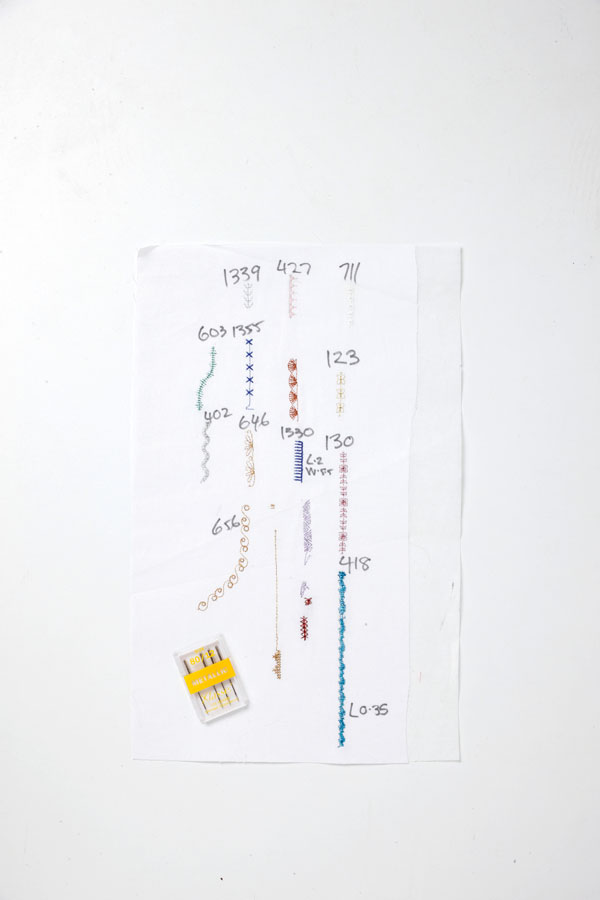
I have used three different Madeira metallic threads in my sample. The first is Metallic Madeira Gold 6. This 200m spool is made of 80 per cent Viscose and 20 per cent metallic. It has a high lustre so looks very shiny and expensive.
I decided to take pressure off the thread delivery to the needle, so instead of using either the horizontal or vertical spool holders, I chose to sit the thread on its base in a box, mug or glass at the back of my machine. I then placed it through the top thread hook, then into the take up lever delivery. This way there is no tension on the thread it delivers to the machine and flows beautifully.
If you don’t have a hook at the back, take a safety pin, close it and tape the eye end to the machine, then run the thread through the eye to the take up the leaver. Or you can purchase a spool holder that has different thread delivery systems. These are pricy and I personally like the box.
With some stitches, I lowered the top tension slightly from 4.5 to 2.5. I did this if the bobbin thread came up to the top. Reducing top tension is a smaller number on all machine applique models.
It’s okay to adjust the tension dial — that is what it is there for! And for all stitches I set the speed of the machine at slow to medium. I did not sew at top speed as these are specialty threads and need to feed through the machine gently.
I stitched a flower chain #123 around one of the circles in the Metallic Madeira Gold 6 and there were no breakages. The next thread I tried was a beautiful white pearl 70 per cent Polyamide and 30 per cent metallic. I threaded the machine in the same way as the gold metallic and again had no breakages.
Then I tried the Madeira Spectra, which is a holographic-effect thread. I was anticipating this thread could give me problems but I was wrong — it was fantastic. I even did a dense satin stitch pattern which looks like grass, which came out beautifully. This thread shines really brightly and looks very glamorous.
With all the threads working really well I thought I would try moving the fabric slowly as I stitched to get some wavy movement inside the circles. It worked a treat.