Mend Fabrics in Ten Different, Creative Ways
If you’ve torn it, flaunt it! Forget invisible techniques used to mend fabrics, they are way too dull and discreet! Today it’s all about parading your patches with Mardi Gras flamboyance and embracing fabric wear and tear as a blank canvas for your stitching artistry.
So let rip and make some darn magic with exuberant embroidery, proud patching, conspicuously colour clashes, wicked weaves and adorable appliqué with these ten creative ways to mend fabrics.
1. Boro Patched Jeans
Designer: Peggy Vonburg
Blog: www.womanwithwingsblog.blogspot.com
Peggy used the style of boro, a Japanese term for mended and patched cloth, to extend the life of her favourite denim jeans. Using various denim scraps cut into different shapes, such as leaves and moon shapes, she hand stitched into place using simple embroidery stitches.
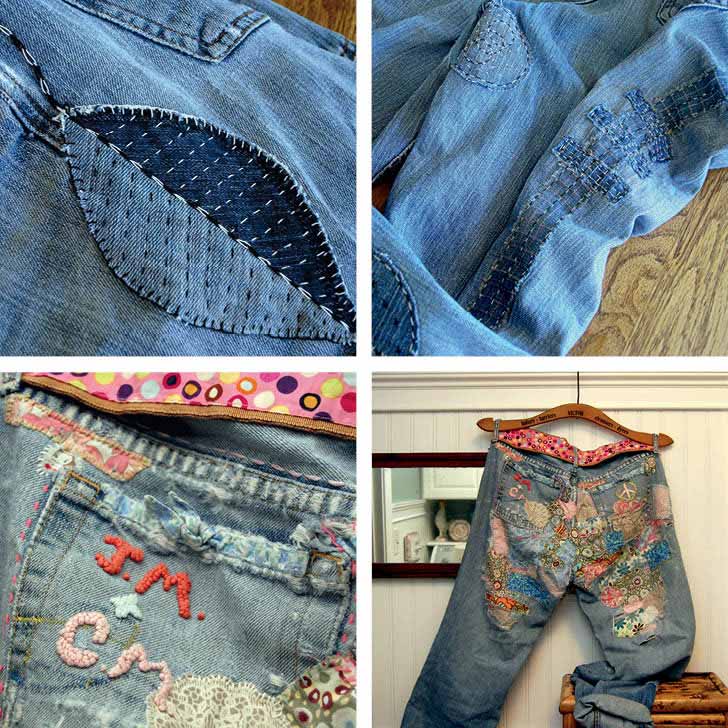
2. By the Seat of My Pants
Designer: Champagne Maker
Website: champagnemaker.com
Blog: crushparty.blogspot.com
Tumblr: crushculdesac.tumblr.com
Instagram/Pinterest/Twitter: @champagnemaker
Champagne Maker has really taken mends to the extreme, creating jeans that are wearable works of art. She used patches of Liberty of London fabrics, along with upcycled baby clothes, all embellished with embroidery stitches and plenty of French knots.
Consider using the Deer O’Deer Embroidery to mend fabrics

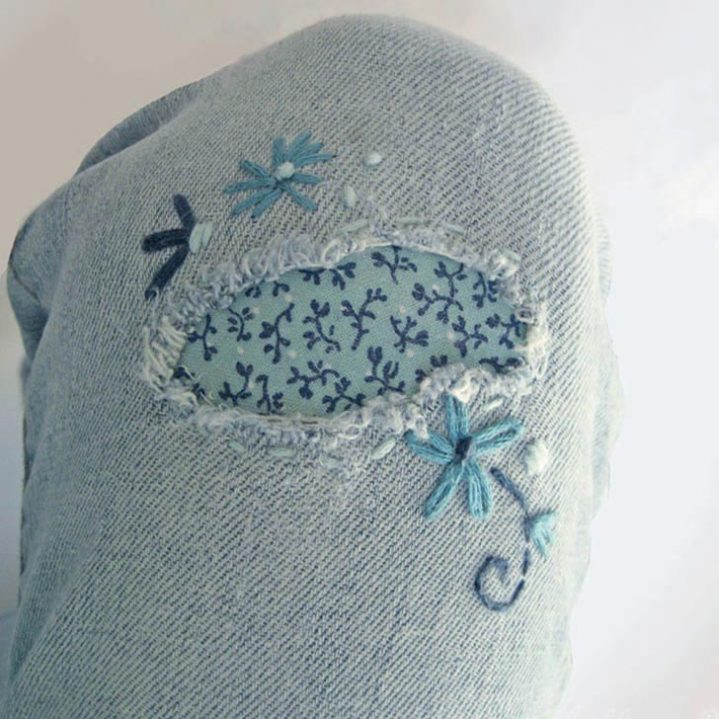
3. Embroidered Patched Jeans
Designer: Aimee Ray
Etsy: www.littledear.etsy.com
Blog: www.littledeartracks.blogspot.com
After wearing a hole in the knee of her favourite old jeans, Amiee decided to patch them up using a technique she saw on Pinterest. “I applied Fray Check to the raw edge so the hole wouldn’t get any bigger, then I cut a piece fabric, large enough to cover it, and ironed it on with fusible bonding tape around the edge of the hole. I added some running stitches at the edge to hold it in place, then embellished with some embroidery. I love how it turned out! I’d definitely use this technique again – I’d even consider cutting a new hole in some jeans just to have mends.”
4. That Green Cardigan
Designer: Tom van Deijnen
Blog: tomofholland.com
Facebook/Instagram/Twitter: @tomofholland
As a self-taught textiles practitioner, Tom creates and repairs knitted items, many of which are done as commissions for his Visible Mending Program. This particular much-loved cardigan was sent to Tom for repair. He then used several different repair techniques, including knitted patches and darning to create such beautiful visible mends.
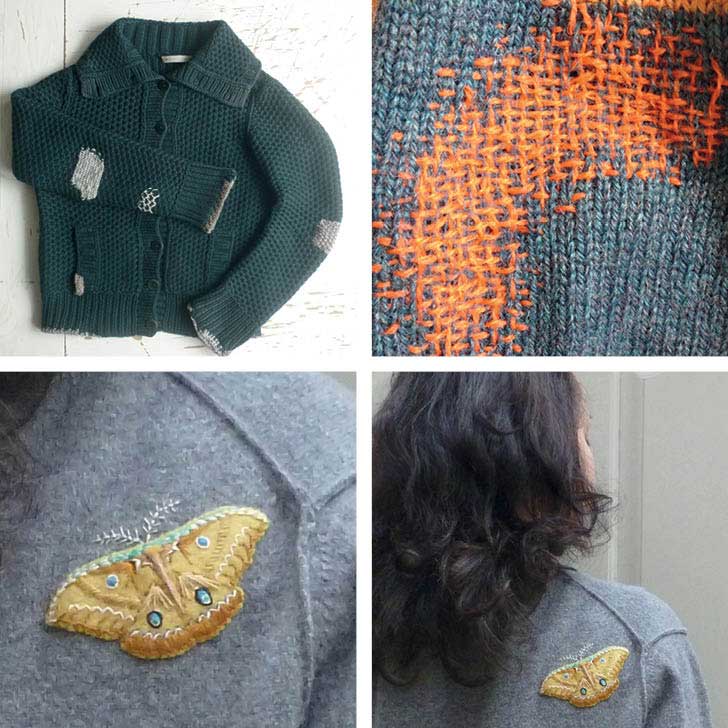
5. Mending Moth Holes With Moths
Designer: Joanie Gorman
Blog: ninimakes.typepad.com
Instagram: @ninimakes
While studying a moth on her window, Joanie was struck with inspiration for an embroidery design – she’d use a moth design to cover moth holes! Using needle felting to create the piece, she then added embroidered detailing and trims around the moth before stitching the motif over the offending hole. If you want to use this creative technique to mend fabrics, you can direct-message Joanie on Instagram and she’ll send you the pattern.
The Fantastic Mr Peacock Appliqué can be used to mend fabrics
6. Doing The Slow Sew
Designer: Kim Andersen
Email: artinred44@gmail.com
Blog: artinredwagons.blogspot.com
Facebook: @artinredwagons
Etsy: www.etsy.com/shop/artinredwagons
Pinterest: @radioflier
Kim received a stack of her great-grandmother’s linens, many of which were fragile and torn in places. Not wanting to lose her newly acquired family heirlooms, Kim looked for a way to carefully mend and strengthen them. Being a lover of Japanese sashiko, she used teabag papers for patches reinforced with line after line of sashiko stitching. Kim says “The paper is surprisingly strong, in spite of its fragile appearance. It seemed to me to be a match made in heaven – 100-year-old linens and teabag paper.”
7. Appliqué heart patches
Designer: Kristyne Czepuryk
Website/blog/shop: prettybyhand.com
Instagram: @prettybyhand
Pinterest: prettybyhand
Although Kristyne really dislikes mending, you wouldn’t pick it by this beautiful solution to holey leggings. It’s all about turning a chore into something creative to motivate Kristyne, so she took inspiration from the boring iron-on patches in store and make her own. Using pretty coordinating fabric, she fused the love heart patches with fusible web and machine appliquéd them for extra hold. She added extra hearts to fill the empty spaces to create the sweetest leggings you’ll ever see.
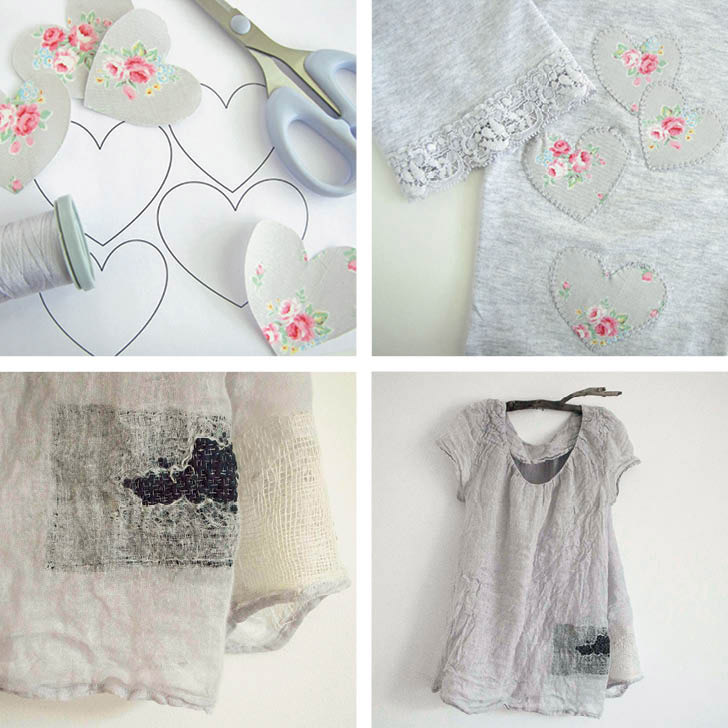
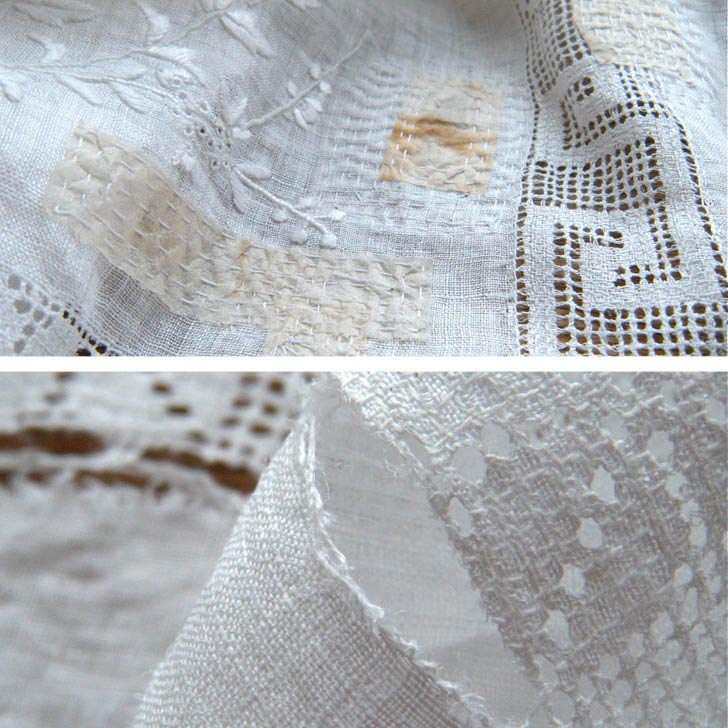
8. Tattered, Mended
Designer: Alessandra Taccia
Website: www.alessandra-taccia.com
A favourite wardrobe item of Alessandra’s, this linen blouse had seen much wear, which required a little ingenuity and the Japanese technique of boro to bring it back to life. Alessandra put a patch behind the least-damaged part with only a few frail threads, then she used sashiko stitching to reinforce the patch. To the most severely damaged sections, Alessandra wove in silk threads.
Consider using the Fireside Fox Embroidery to mend fabrics
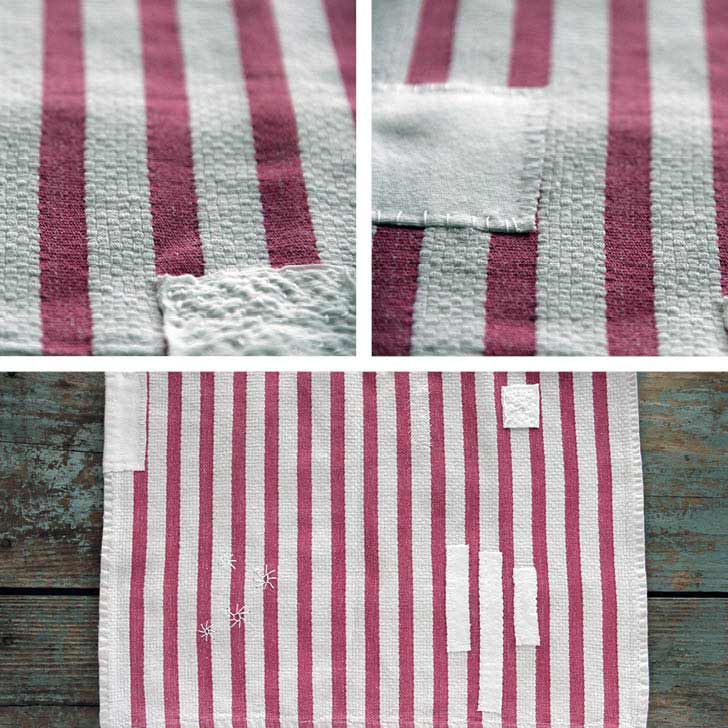
9. Mending of a Tea Towel
Designer: Natalie Chanin of Alabama Chanin
Website: AlabamaChanin.com
Blog: Journal.AlabamaChanin.com
Facebook: @visitalabamachanin
Instagram: @AlabamaChanin
Natalie’s favourite 10-year-old tea towels had seen better days. With scraps of organic cotton jersey and Button Craft thread, she used seed, whip and eyelet stitches to patch up the fabric. Natalie loves the mended effect and is reminded of a quote from Sister Parish: “Even the simplest wicker basket can become priceless when it is loved and cared for through the generations of a family.”
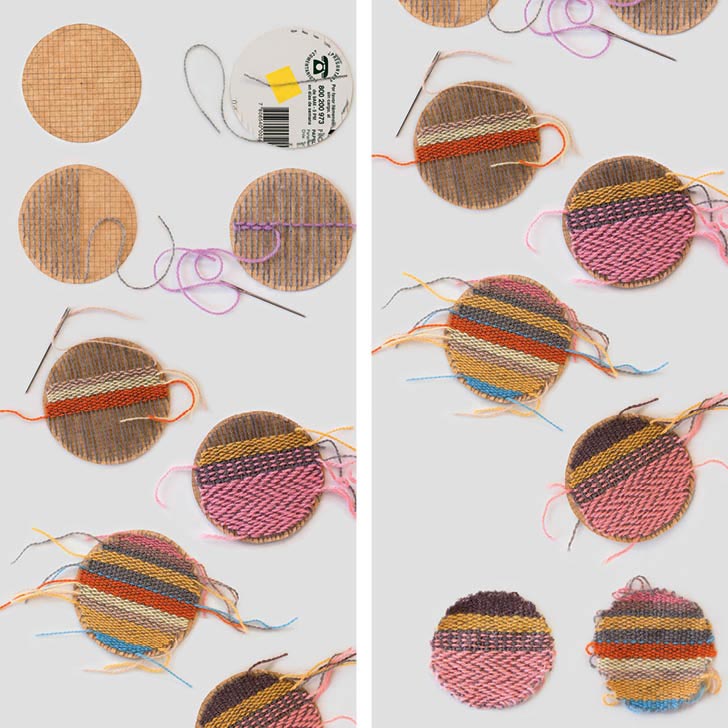
10. Creative Mending Patches
Designer: Karen Barbé
Blog: blog.karenbarbe.com
Instagram: @barbekaren
Facebook: @karenbarbe.textileria
These patches are woven on a cardboard loom and are a creative and fun solution for mending holes in garments or just as embellishment for not-so-old ones.
How-to:
1. Cut a circle of cardboard (cereal box cardboard works good) and draw a grid on it. The circle here is roughly 9cm of diameter with a grid of 4mm. Draw an inner circle 4mm smaller and cut slits in all vertical lines. Don’t go through the inner circle line.
2. Secure the tail of your yarn on the back with masking tape and start running the vertical threads through the slits until you cover the whole circle.
3. Start weaving in the middle using a blunt needle. Go under the first thread, then over the second one, under the following and so on. In the next row invert the sequence: go over the the first one (note you are working now from the opposite side), under the next one and then over the following thread and so on. The third row starts from the same side as the first one following the same sequence.
4. You can change the colours of the yarn or experiment with different sequences, for example, going over two threads and under one for a herringbone effect.
5. When finished remove carefully the cardboard circle or tear it if necessary.
6. Hand wash your patch, weave in all tails and sew it to the material to be mended, tucking in all the border loops.