Road Test: Kaniva Template Set by Little Desert Quilts
Driven by Michelle Marvig
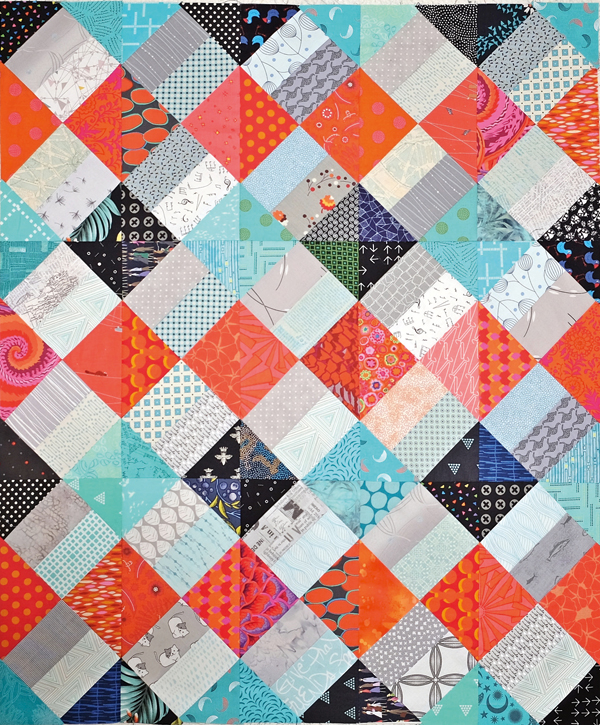
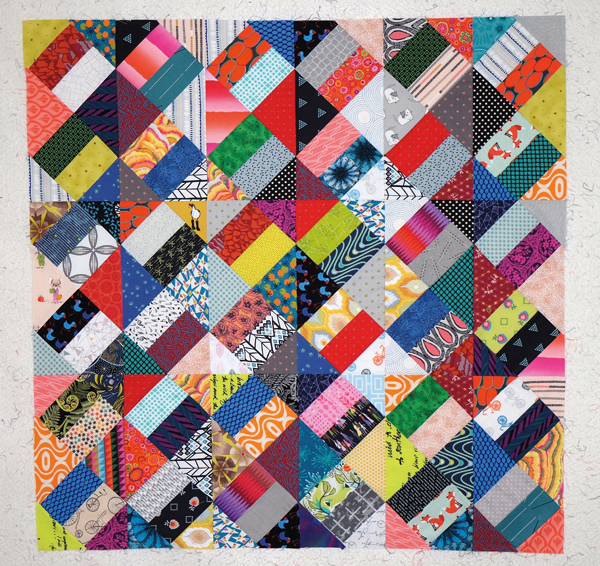
The lament of every quilter that I have ever met, or know, is that we all struggle with lack of discipline when it comes to buying fabric. We all have plenty at home and tell ourselves “no more”, but we still buy more when temptation is in front of us! We just can’t help ourselves. We also have left-over bits and pieces from projects that we have completed. Our storage areas may be busting at the seams. Does this sound like you? It certainly accurately describes myself. Fleur Madden, of Little Desert Quilts, has designed a template set to help work our way through our stash; she has designed the Kaniva Template set for making her original design block — Kaniva. This block measures 5 3/4in x 11 1/2in completed.
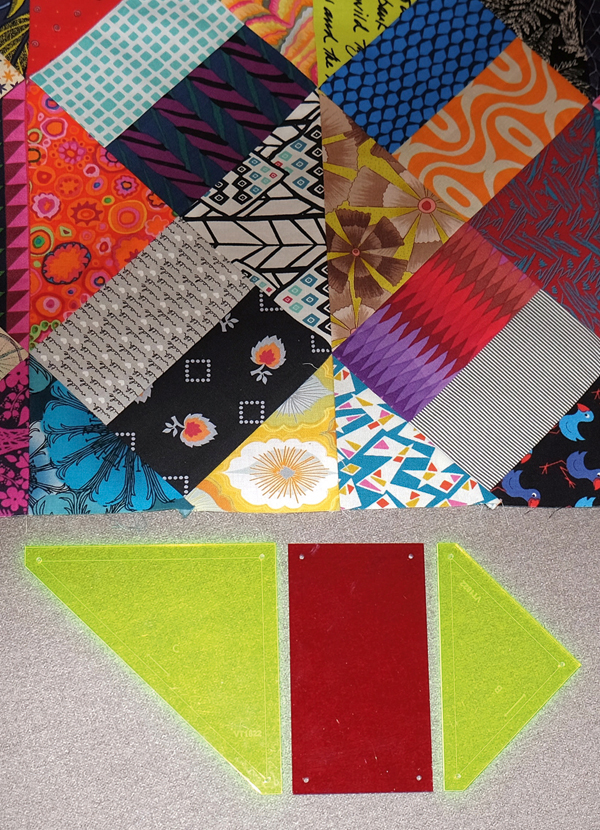
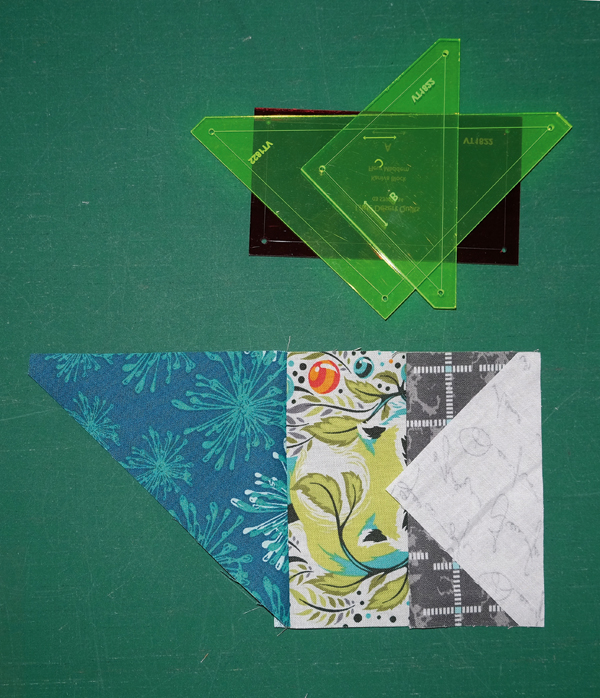
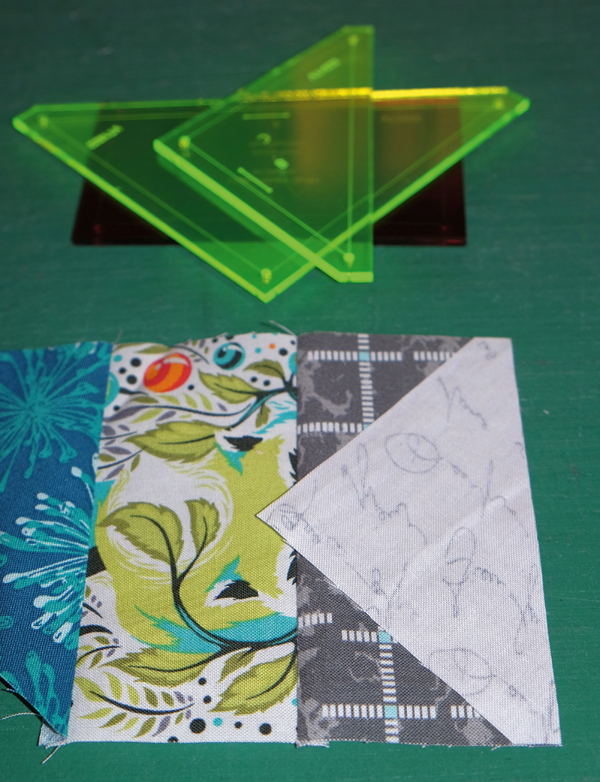
The template set comprised three acrylic shapes. Two different-sized triangles are offered in lime green, with seam allowance marked, junction holes and grainlines. The third template is a rectangle with the same markings, but in red. This template does double duty. It is not only used to cut the fabrics, but to also grade the fabrics. If you are unsure about the value of a chosen fabric, use the box in the pattern sheet provided. The fabric is placed next to the grey printed rectangle. You look through the red template at your fabric. If it is lighter than the grey rectangle viewed through the template, the fabric is used as a light in the design. If it is darker, it will be used in the dark side of the block. Fleur suggests that if you are still unsure, do not use the fabric. So what the red template does is to show you the value of the fabrics. This is useful for all quilts. You can lay out your selection and then look through the template. The values will shine through, not the colours. This is very important in some patchwork designs.
The two triangles are used around the edge of the block and following the grainlines on the templates is important, as this places the straight of the grain around the edge of the pieced blocks. The use of the standard lime green allows you to see through these templates if you wish to fussy cut a design. But how to use these templates?
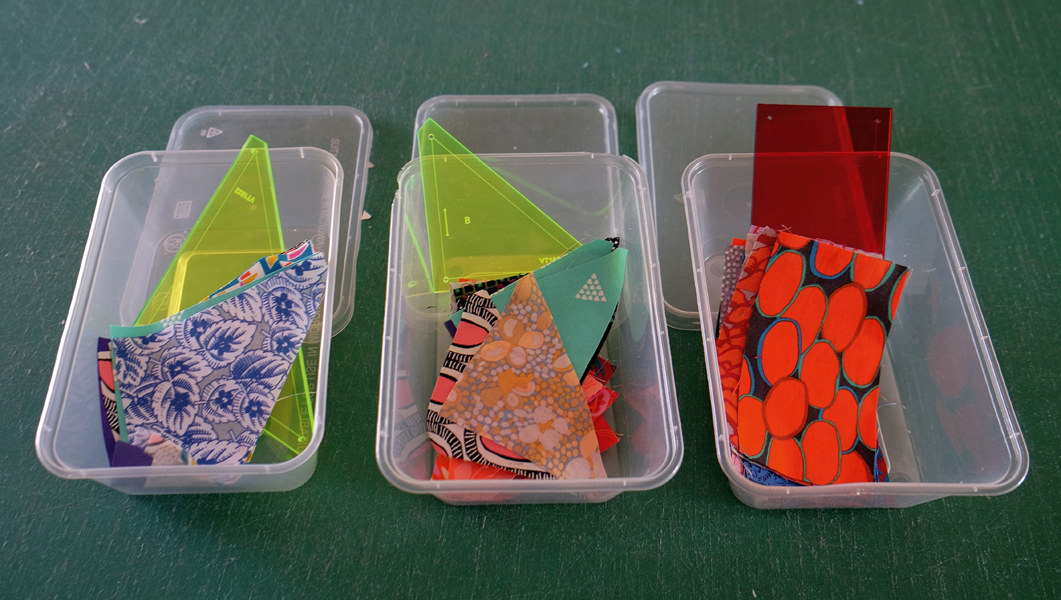
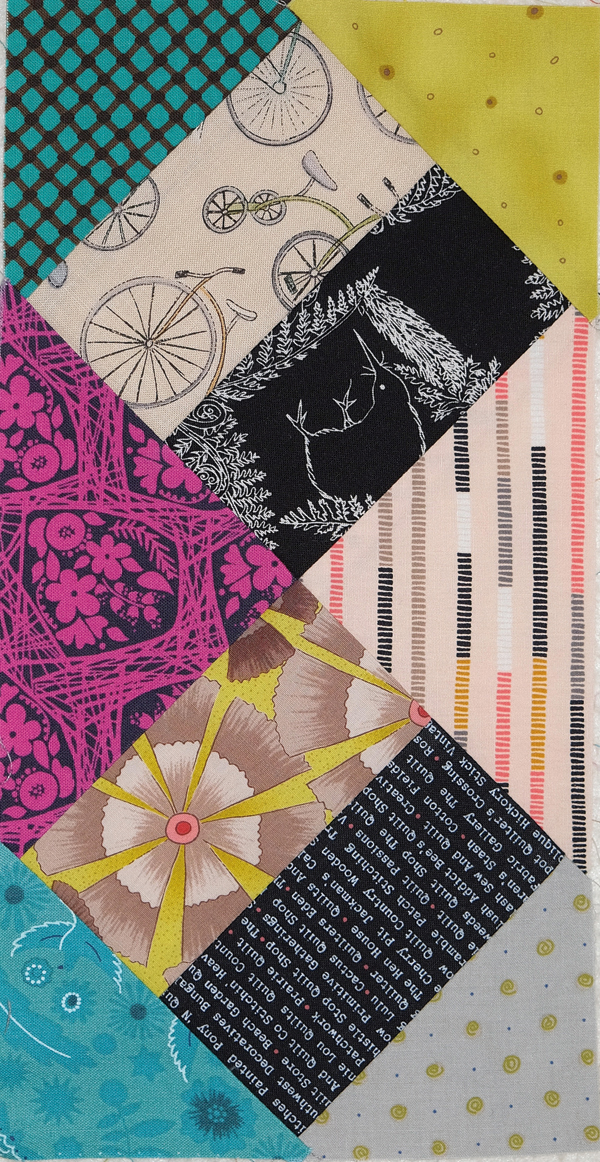
Fleur has designed an original block that she has called Kaniva. It was originally designed to utilise scraps and left-overs, but you can also use limited-colour palettes and change the look of the quilt. Fleur has given options for cutting from scraps and cutting from strips if you prefer. As you are cutting up your fabrics for your projects, you can cut the Kaniva shapes at the same time. Use ice-cream containers or take-away containers to keep the cut fabrics in their separate shapes and values. You might cut pieces for many months and not even notice the little extra time that it takes while the fabrics are on the cutting board.
When the containers have a significant amount of fabric, you will be ready to sew your scrappy Kaniva quilt. You could also hold swap days with friends. This design would also be a good one for community quilts, when donated fabrics of varying sizes are used to make quilts for donations.
The piecing of the Kaniva block is easy. In the basic scrappy version, two 2 1/2in x 4 1/2in rectangles (cut from the red template A) are sewn together and pressed to the dark. Both large and small triangles have blunted ends, making them easy to line up with the pieced centre. The larger triangle C is then stitched on one end, and a B triangle on the opposite end. Press towards the large and away from the small. A second B triangle fills in the corner, as per the diagram, and this seam is pressed towards the triangle. Scrappy Kaniva has a light half and dark half of the block. Both are pieced and pressed the same. I went on to also make a version using a controlled group of fabrics, and used the same piecing and pressing technique. When the blocks are sewn together, most seams will oppose. The final diagonal seam in any block can be pressed in either direction, the one that opposes the seam in the adjacent block.
Once you are comfortable with how the block goes together, and have significant fabric cut, you can actually piece a Kaniva block, while piecing other projects. Use these shapes as the “leaders and enders”, or the item that you stitch between your seams, so that you can do continuous chain piecing.
These templates are easy to use, and the block a good design for using scraps. With extra time and a design wall, I could see these basic shapes making other projects too. For instance, you could make an Eye-Spy quilt, swapping a 4 1/2in fussy cut square for the two A rectangles in the block. Fabulous and fast for a baby quilt. The four corners could be cut from stripes and give medallions, or kaleidoscope squares in the overall design. I am yet to try the blocks as a border, but they would definitely work for that as well. However, they have originally been designed to use your scraps, and they are marvellous for this purpose. All the rest is a bonus.
Contact Fleur Madden at Little Desert Quilts for more information, phone (03) 5392 2234, or visit the Facebook page @Little Desert Quilts.