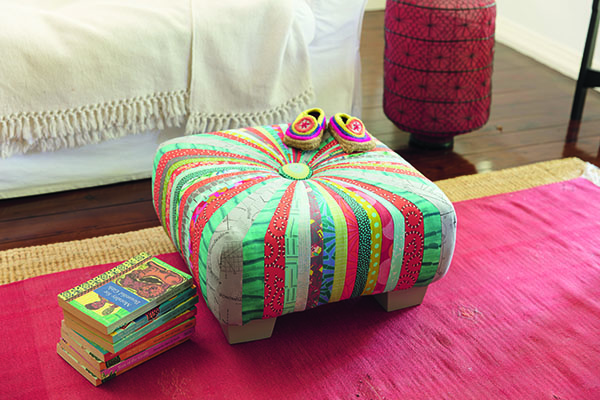
Road Test: Square Tuffet by Quilter’s Cocoon
Driven by Michelle Marvig
Quilters are creative people. Most are involved in multiple crafts, or have at least tried other crafts. Our quilts may keep us warm, but they also add colour and pattern to our houses. They are also integral to our home decorating. For years I have been looking for a new footstool for my loungeroom. I had seen images of tuffets on Pinterest, so was excited to see one “in the flesh” while away on tour in America. They looked so professional that I had to try to make one. It would involve patchwork and decorating at the same time. And the best thing … I could choose my own fabrics!
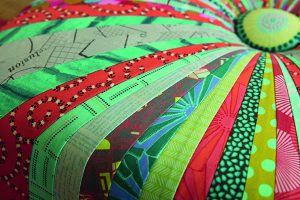
Tuffets come in round and square shapes. Some of the round ones are made using a wedge ruler. I opted for the 18in x 18in square tuffet pattern by the Quilter’s Cocoon. The pattern consists of a colour, printed brochure and pre-printed fusible foundations for the piecing of the cushion. It’s suggested that you read all instructions before you start, and I would agree. There are two ways to use the fabric when making the tuffet. You can choose to do a large, central feature panel, or do the scrappy version, as I have done. However, both include the same corners.
Learn an easy way to create trapunto
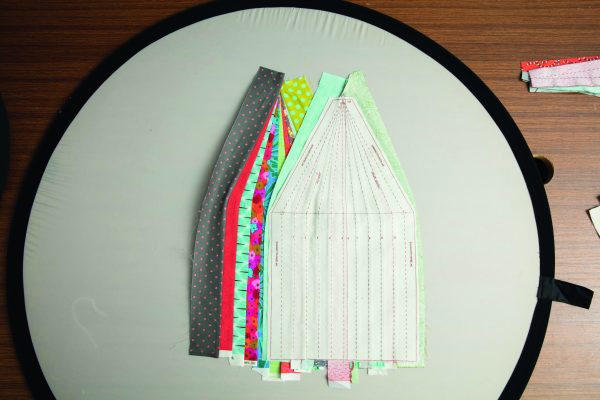
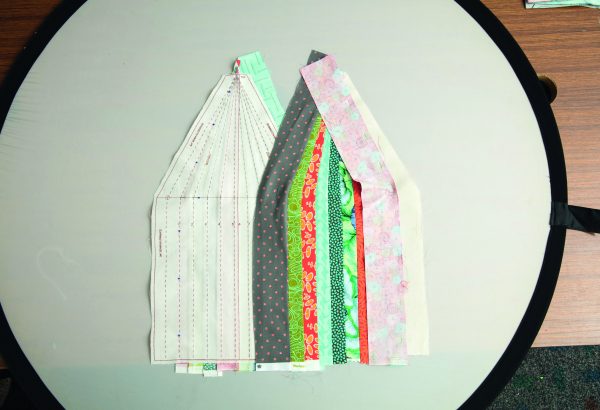
The first thing you need to do for either is to cut out the multiple pieces of pre-printed fusible interfacing. Then sit quietly and plan your fabric placement. The pre-printed corner fusible patterns are simply fused to the wrong side of the three fabrics that are chosen for the corner, then cut out on the outer line. For the scrappy version of the cushion, however, the side panel pre-printed fusible foundation is actually first fused to the wrong side of calico, before it is cut out.
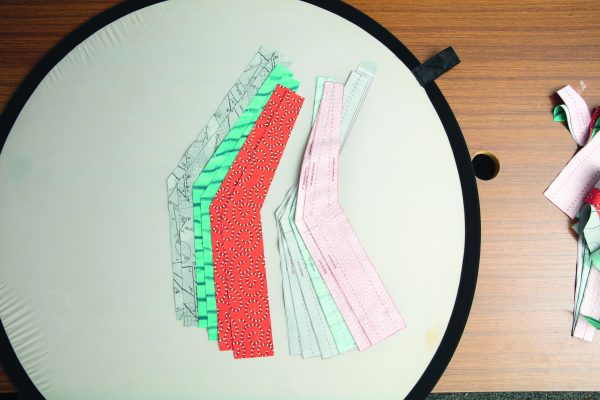
Each side panel requires 10 x 2½in strips. Traditional foundation piecing is then used to construct these panels, using the calico/pre-print for the sewing lines. Piecing starts in the middle and works out. The seams need to be trimmed at the top edge to avoid too much bulk. As you work towards the edge, the seams bend at the line in the print. Each strip presses back flat, particularly well when you use Best Press starch, as they suggest. Once all your pieces are on, this panel is then trimmed to the outside line.
Make your own Japanese-style stencilled fabrics
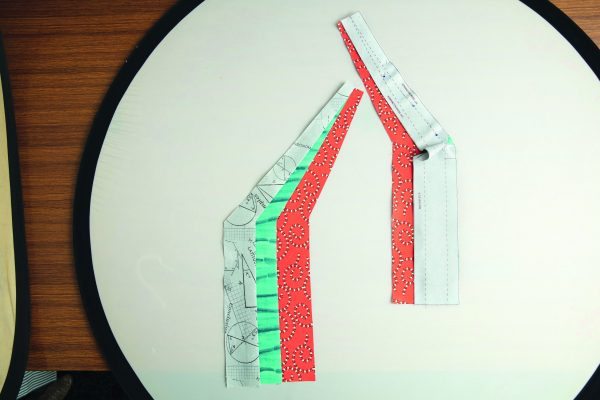
The seamline is printed so there’s no need for special feet when constructing the tuffet cover, however a larger needle helps with all the bulk of the layers. The corner sections have left and right sections that are pieced. A small clip of the fabric is required at the pivot point to make the corner turn. The stitched corner panels of three fabrics are then sewn onto the scrappy pieced side panels, also pivoting to make the corners. These four main pieces are then sewn together to make the cover. I found that even after trimming away, I could not get right through the very middle thickness of fabric. But the gap was small enough to be covered by the large button that was to be placed in the middle, so I was not concerned. Small stitches are used to construct, for extra strength. A hem is then turned up, and this is important, as the staples are placed in the double layer of the hem when you are assembling the tuffet.
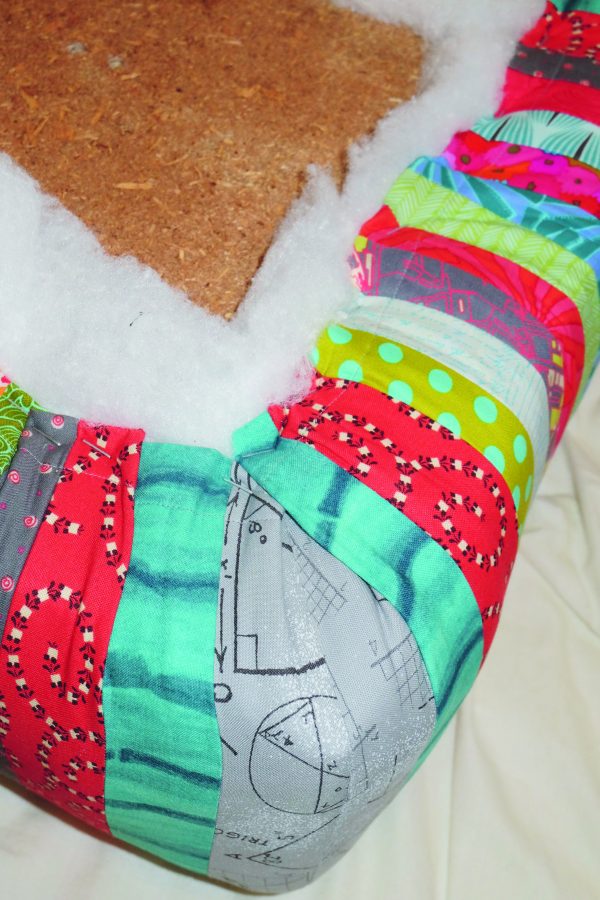
If we lived in the United States, we could buy a finishing kit with all the hardware that is required. However it is big, bulky and heavy to ship to Australia, so my challenge was to see if I could find all the items easily in my local area. I’m happy to say, mission achieved, although you will need to use some of your hubby’s tools. This tuffet is a substantial piece of furniture. It has a 17½in square of ¾in thick wood for a base. I used a leftover piece from the garage.
Regardless of your type of wood, the edges need to be smoothed as the fabric and batting will be placed over this edge and anything sharp would rub through. Holes need to be drilled for the centre button and for your feet. I found Bunnings had a variety of feet in stock, and the nuts and hardware that is required to put them in place on the finished tuffet. A slightly larger piece of high-density, 6in-thick upholstery foam is glued to the top of the board. This foam is quite expensive, but the high density will last a long time and is worth the extra money. However, if you go to your local Clark Rubber, you will find the different types of foam that are available and you can make your own choice. They cut it to size for you.
Create a modern woven plaid quilt
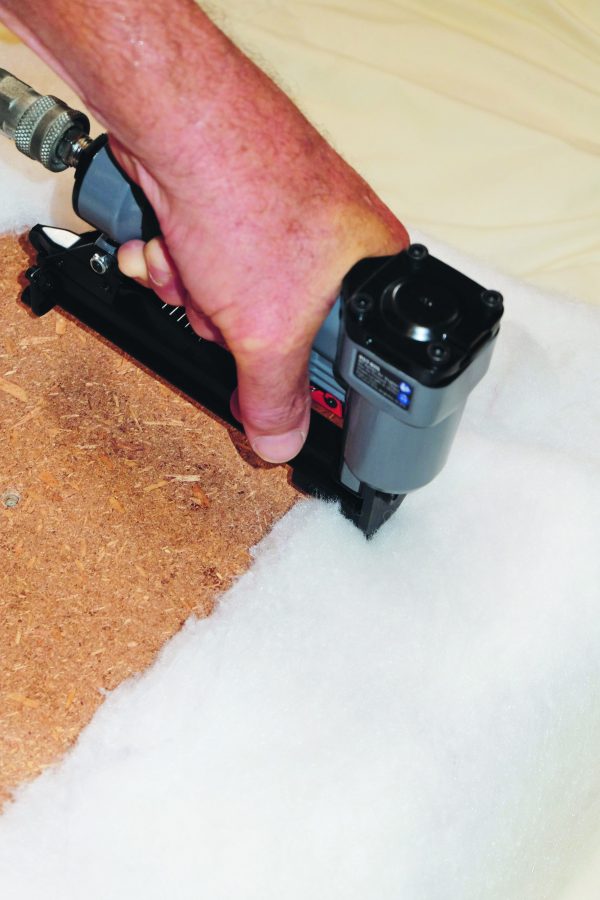
Then the real fun starts. A 40in square of upholstery batting is laid out on a flat surface. The foam and board are then placed in the middle, foam side down. An electric stapler is then required to staple the foam in place. Start in the four corners. Keep your fingers out of the way. Pull the batting firmly around the foam and wrap over the board base, but do not cover the holes for your legs (don’t ask me how I know this is an important step!!). Staple the corners, then work your way around along the sides. Try to keep the edge flat. Any real lumps will be seen through the fabric outer cover. Excess batting is trimmed, then the fabric outer cover can be pulled over the top, down the sides, until it wraps onto the board base. This is then stapled through the double layer of the hem for extra strength. Mine ended up a little long. If this happens to you too, fold the hem over again; you cannot leave it long as it will cover the holes for the feet.
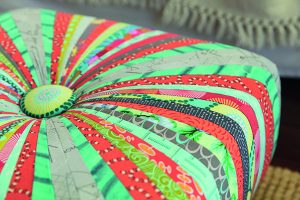
To complete the tuffet, you need to cover a 2½in covered button with batting and fabric, stitching it on the back as per the instructions. Then a strong cord is required to be stitched through the fabric and batting, leaving long tails, which are taken through the foam and out the holes in the base. Pressure needs to be applied as you tie the button cords, as this creates the shape in the top of the tuffet.
I painted the bare feet, but you could stain. A fabric and batting cover is also made to neaten the underside of the item. Holes are cut for the screws for the feet, then the covering piece is also stapled in place. Note that we did do a dry run first and found the feet sat off the base, towards the middle, because of the thickness around the edge. So before gluing the covering piece, we glued small squares of thin wood at the inner corner of the feet to even out the thickness. The feet can then be gently screwed into place and your tuffet is complete.
I thoroughly enjoyed making this item, and love it in my loungeroom. Lucky for me, you can buy extra foundations, as both my children have expressed an interest. Check out http://www.quilterscocoon.com if you too want to try something different.