
Ask Deb: New from Old
We have all heard of the term “re-gifting” — you know — the present from a relative that perhaps … well, is not quite right for you. Then you re-wrap and gift it to someone else. Not that I am guilty of that myself mind you!
Well, I was cleaning out my sewing storage area and there I found a quilt top that I must have bought some eight to 10 years ago from one of the local quilt shows in my area. I couldn’t resist as it was beautifully made and all it needed was machine quilting — and yes, I can do that. With all good intensions I popped it in a bag, then into storage for a time when I was free to quilt it.

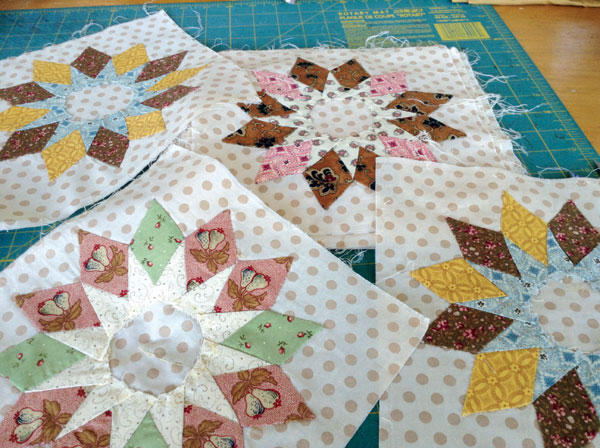
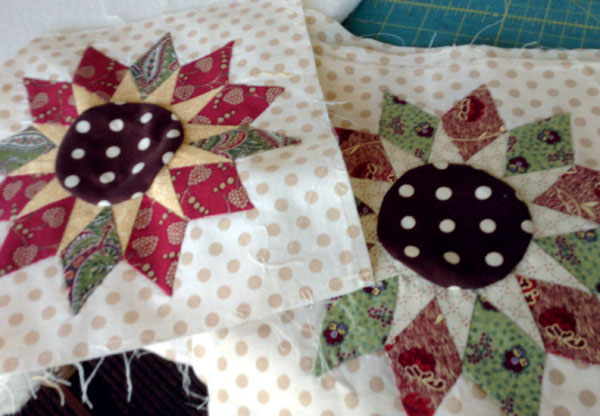
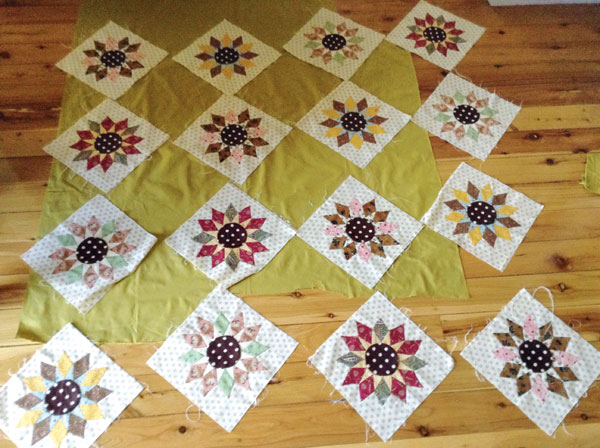
A little while ago I found the bag with the quilt top and I thought, now is the time. But, eight years later, my tastes have changed and I thought the colours and fabrics looked a bit dated. I liked some blocks better than others. What to do? Unpick, that’s it, I thought, I’ll unpick the top into blocks and separate them. I really liked the star block (sorry, I don’t know the block name) with the light tan spot as the background fabric. That I could work with. There were 16 of them — quite a useable number to make a decent-size quilt. I wasn’t keen on the centre colour of each block so I unpicked the centre circles and replaced them with chocolate brown and white spot circles.
Learn an easy way to create Trapunto with Deborah Louie!
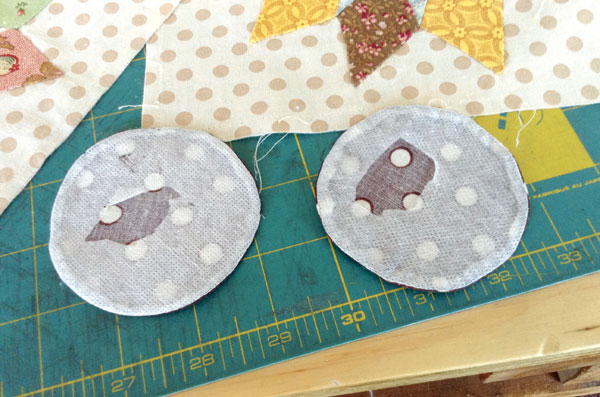
I made these by cutting 16 circles from some brown spot fabric I had in my stash, as well as cutting 16 circles the same size out of light-weight stabiliser larger than the hole now in the centre of the block. With right sides together, I stitched an 1/8in seam around the inside of the 16 circles. Cutting a hole in the centre as the picture below shows allows me to turn the circles right way out, resulting in 16 beautiful circles ready to blind hem appliqué.
Blind hem is a simple stitch, which I sew using Superior Threads’ MonoPoly in the top with a size 70 micro text needle and white bobbin fill in the bobbin. The stitch is three to four straight stitches and then a sideways v stitch. We want this as small as we can possible go to minimise seeing this stitching.
Learn how to quilt on your home sewing machine
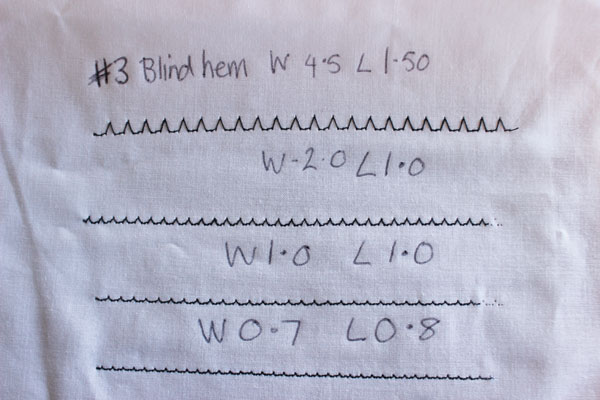
I always make a stitch sample on spare fabric before I start sewing my blocks. The sample shown is the default machine setting on my Bernina 770 of #3 blind hem. This had a length of 1.5 and a width of 4.5. This setting is way too large for blind hem. I then gradually reduced my length and width as shown in the samples until I reached my desired setting of 0.7 width and 0.8 length — perfect tiny stitching. If your machine does not have blind hem, try out a blanket stitch and reduce the width and the length. This should work for you.
The straight stitches are placed on the background fabric and the side V stitch sits every three stitches on the edge of the appliqué. When this is done with the MonoPoly thread, the stitching is invisible.
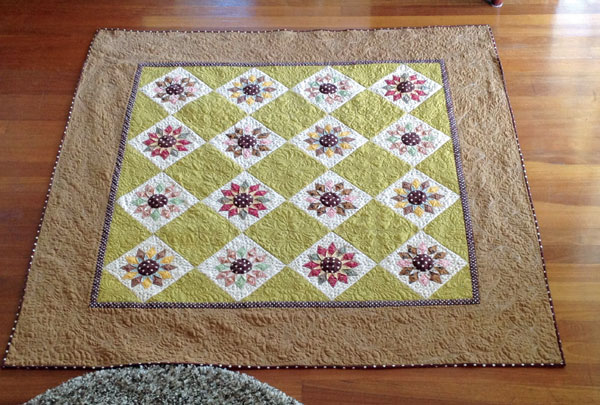
I then auditioned lots of colours and fabrics to have as the alternate blocks, and settled on the solid khaki green. This green is a good contrast to the light background in the star blocks. I think it complements the block well and will stand out beautifully. The star block and the khaki plain blocks were stitched together and I then added a 1in finished small border around the outside before the large 8in brown border was attached.
I had some fun free motion quilting inside the pieced blocks with continuous curves and free-form feathers in the solid plain blocks and the borders.
I hope this inspires you to re-quilt old tops that perhaps you’re not so fond of now. Cut them up, re-stitch together with the latest fabrics to give them a new lease on life.
Happy Quilting, DEB