Learn to make sustainable beeswax food wrap
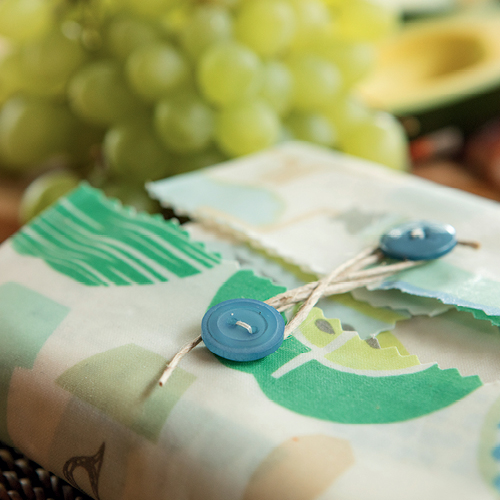
Reusable food wraps are a great eco-friendly alternative to plastic food wraps such as cling film and snap-lock bags and you can make your own 100 per cent natural, made from quality cotton fabric and Australian beeswax food wraps by following these 8 easy steps.
Make your own reusable shopping bags
They are easy and affordable to make and what’s more, they make a terrific gift. They will save you time, are healthier for you, and are great for the environment. They’re also fun to make.
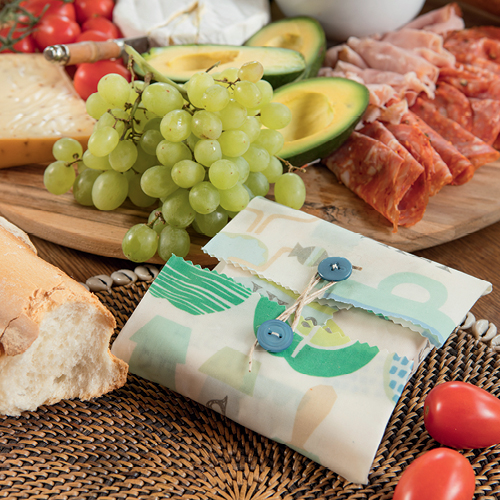
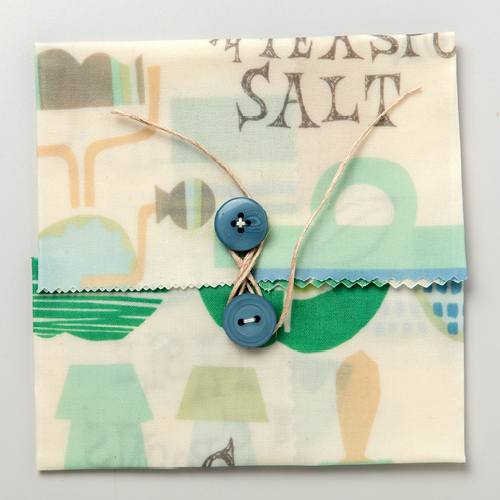
Use these wraps to create gorgeous reusable snack bags, sandwich wraps, food wraps and bowl covers. The malleable wrap can also be folded and formed around various shaped bowls. The warmth from your hands will help mould the wrap into the desired shape. Because the beeswax repels water and moisture, they are ideal for covering foods such as cheese, vegetables, nuts, some fruit and crusty bread. However, they are not suitable for covering meat products as they cannot be washed in hot water. They are also not suitable for wet or juicy products. Always hand wash in cold water with mild soap and then hang out to dry.
Depending on how frequently they are used, these food wraps can last for up to one year. If the fabric is still in good condition they can be re-waxed. However, if you need to dispose of them they are fully biodegradable.
Create your own Owl Read it to you Library Bag
What you’ll need:
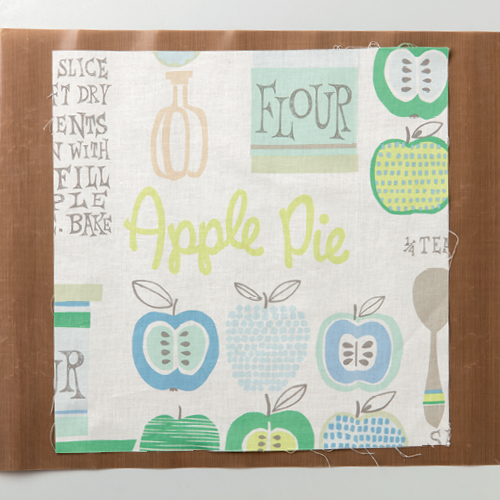
1. Good-quality cotton fabric
2. Pinking shears
3. Two heat-resistant Teflon mats
4. Beeswax (Note: different-colour beeswax may alter the colour of your fabric)
5. Iron
Here’s how you do it:
1. Wash and dry your fabric.
2. Cut your fabric to desired size. We used a piece 12in x 12in. Ideally, don’t cut your fabric larger than the size of your Teflon mats.
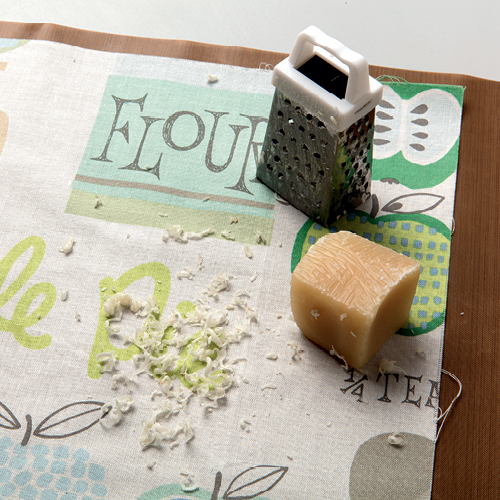
3. Working on a heat-resistant surface, place down one of your Teflon mats and then your piece of fabric right side up.
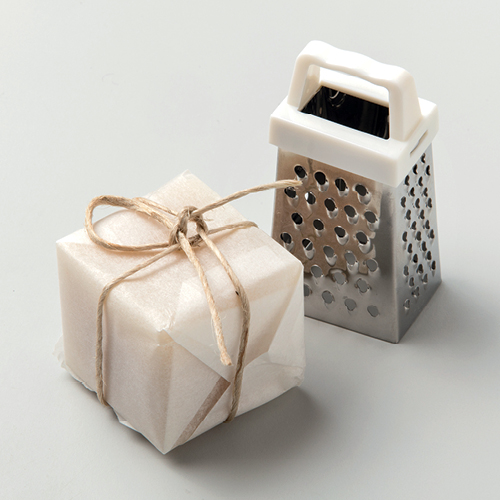
4. Grate beeswax over the entire surface of your fabric, making sure you cover the edges. It should look like cheese over a pizza.
5. Cover over your second Teflon mat and with your iron on a hot cotton setting, iron over the top of the Teflon mat to melt the beeswax underneath into the fabric.
6. Remove the top Teflon sheet and inspect the fabric. Areas which haven’t been covered completely with beeswax will be lighter in colour. Sprinkle those areas with grated beeswax, cover and iron again.
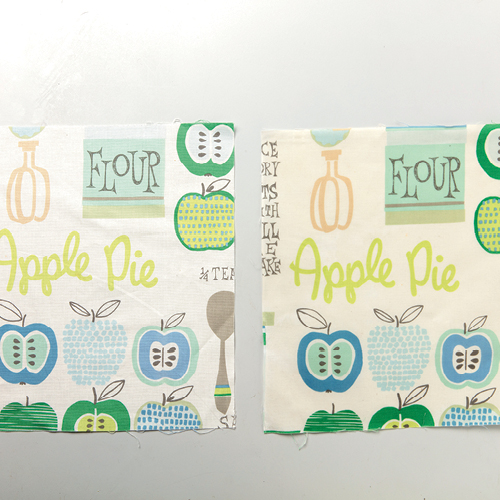
7. Carefully (it will be hot!) remove your fabric and place it on top of a clothes horse to allow the wax to cool and set. The fabric will stiffen as it cools.
8. Once the fabric is cool, use pinking shears to trim the edges. This will help prevent the fabric fraying. It’s now ready to use.
In need of an Ipad cover?
Get a sustainable beeswax food wrap kit
Kits containing a block of beeswax, a mini grater, two Teflon mats, a storage jar and a 12in square piece of fabric are available from Marie’s business, Mercier.
- Kits cost $34.95 + $8.95 p&h.
- Ph: 0425 710 040
- Email: marie@mercier.net.au
- Facebook: www.facebook.com/www.mercier.net.au/
- Instagram: @merciersyd