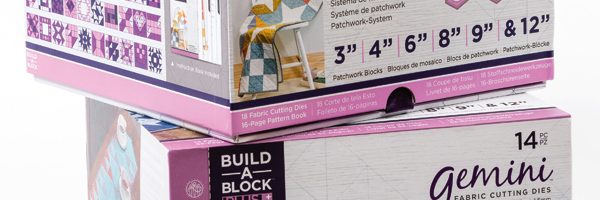
Know Your Product: Quilting Rulers
There are a few basic quilter’s rulers that everyone should have, and then there are a whole lot of specialty rulers. What brand suits you best is up to you, although it is recommended that you buy rulers of the same brand as they interchange more easily due to the markings being the same style and measurements. Some acrylic rulers offer a non-slip backing to add stability and safety when cutting. A frosted back with black grid lines may add clarity on light and dark fabrics.
Selecting the right quilting ruler depending on what you are making can help save you time and money. Once you figure out what type of quilting ruler you are most comfortable using, you will find you can do most of your cuts with just that one ruler.
We have previously looked at cutting mats (QC#96) and rotary cutters (QC#97). With the addition of a quilter’s ruler, your sewing life will become much easier and more accurate.
There are many sizes and shapes, but it is widely agreed the first quilting ruler you should buy is the 6in x 24in. That is because it’s the most versatile, and is most likely to become your most-used ruler. The long ruler allows you to cut across the width of the fabric easily. Fabric on the bolt is generally 42-44in wide and folded, meaning the ruler is long enough for a full cut. From there you can cross cut the strip into smaller pieces.
Next to add would be a square ruler; one that is as big as the largest block size you make is best. Generally a 12in x 12in will suit this need.
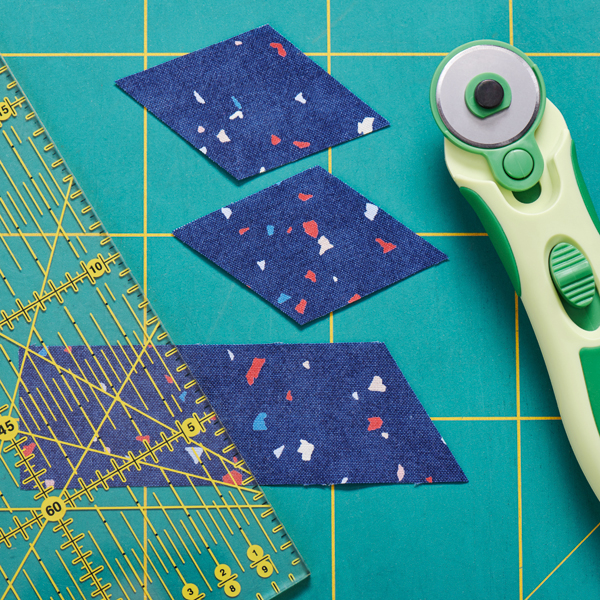
Specialty rulers are designed to produce one style of shape or unit. Since half-square triangles are featured in so many blocks, a ruler that helps when trimming HSTs is very handy. On the subject of HSTs, a 1/4in ruler can be handy for this technique, as is a square ruler. The diagonal line across a square ruler will assist with trimming your blocks once sewn. Simply line up your sewn line with the desired block size line and trim away the extra fabric at the side and top.
Tips for cutting fabric with a rotary cutter, quilting ruler and mat
- Cut the larger pieces first, then the smaller.
- Leave the selvedge intact with the fabric range and name on it — this makes identifying the fabric easy if you require more at a later date.
- When cutting squares, first cut a strip across the width of the fabric, then cross cut to the size required.
- Folding the fabric accurately is a must; if you don’t make your cuts at 90 degrees to the fold, you will have wonky strips or, as some people call them, boomerangs.
- Always use a sharp blade.
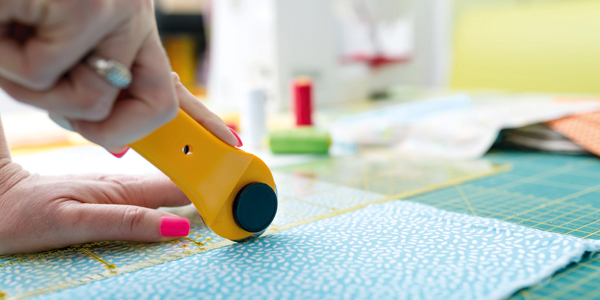
- Stand to cut fabric so you can place even, firm pressure onto the ruler to ensure it does not slip while you are rolling the blade along it.
- Place the fold of the fabric nearest to your body so that you can place the ruler accurately along the last folded edge.
- Always cut away from your body.
- Both the ruler and the cutting mat will feature lines and measurements — some people use one or the other predominantly and others will refer to both.
Cutting with a quilting ruler
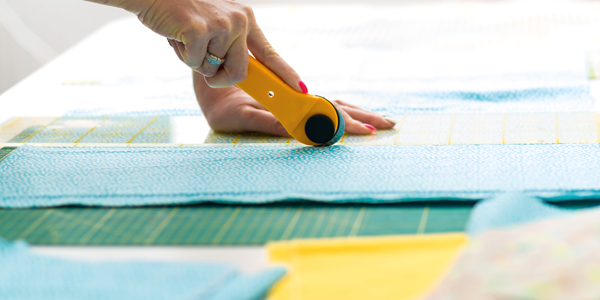
- Fold your fabric. With the fold nearest you, line up a horizontal line on the ruler along the fold, with the long edge perpendicular to the fold. Position the long edge so that you can make a smooth, long cut to straighten the fabric and make it a 90-degree angle to the folded edge. If you are right-handed, the bulk of the fabric will be on your right. Cut off just enough fabric to make a straight edge.
- Turn the mat, or the fabric, so the bulk is to the opposite side to begin cutting your strips.
- If you require 21/2in strips, place the ruler so the first cut edge of the fabric aligns with the 21/2in mark on the ruler. Make sure the fabric lines up all the way down the edge of the fabric, not just at one place. Check that measurement before you cut.
- Place your left hand on the ruler, spreading your fingers for stability. Press the rotary cutter firmly onto the fabric, lined up against the ruler’s right edge. Cut along the ruler, keeping the blade against the ruler. Do not cut beyond your hand position — stop without moving the cutter away, reposition your hand and continue cutting.
- Before cutting any more strips, check that the strip is straight and not wonky. If it is wonky, you will need to refold more accurately.
Specialty rulers
There are rulers for many shapes and sizes. Their purpose is to provide the quilter with a more simple, accurate method of cutting fabrics.
Cost may be a decider for you. If you buy a ruler and only make one quilt using it, you may not find it that economical. But if cost isn’t an issue, or you plan to use it a number of times, then you can have a choice of many, including rulers to help you cut curves, circles, strips, binding, wedges, scallops, hexagons and more.
Features to look out for:
- Non-slip backing: Some acrylic rulers offer a non-slip backing to add stability and safety when cutting.
- Frosted back: A frosted back with black grid lines may add clarity on light and dark fabrics.
- Large bold numbers and measurements: It can be hard to locate where the line is that you require; a ruler that is clearly marked is easier to use and less frustrating.
- Angles: Generally the 6in x 24in ruler will also have a 30-, 45- and 60-degree markings. These allow you to cut more than just strips with this general-purpose ruler.