Quilting Tools with Anita Ellis!
These are a few of my favourite things … or in other words, quilting tools I use every day and wouldn’t be without.
There are myriad gadgets and must-haves that the manufacturers of quilting notions insist you cannot do without. You could really spend up big, or you can spend smart and buy the things that help you to craft your projects effectively and with much joy.
Everyone has different needs, so I will be discussing the things that I believe a machine quilter and patchworker will get good value from in their everyday work.
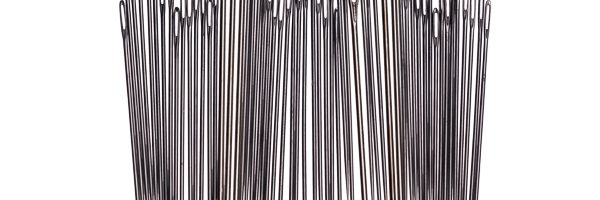
Needles
Needles for machine quilting
These needles have quite specific properties: sharp and smooth to get though many layers, strong to reduce needle deflection when you are pulling your quilt in all directions and with an eye appropriate to the thread you are using. The size of the eye will affect the size of the needle, and should be chosen to match your thread. The finer thread demands a smaller needle, the thicker thread a bigger needle. With a 40-weight thread such as Glide I use a 90/14 top stitch/quilting needle. If I was using a finer thread, I would go down to an 80/12 size. Experiment to see what suits your particular quilt and thread choice.
I often hear that you should replace your needle every eight hours or so. I’m not sure that I agree with this. I change my needle when I start to have issues, such as skipped stitches or I hear the popping noise of a blunt needle struggling to get through the fabric. Depending on the intensity of quilting I am doing, this can be a few hours to a few days. Obviously, another time to change it is when you hit a stiff seam intersection and the needle either breaks cleanly or bends. Watch out for that bend as it can cause all sorts of trouble, and make sure you retrieve all the bits of the broken needle so they don’t get caught up in the hook mechanism of your machine or stuck in your foot.
Self-threading needles
If you haven’t tried them, you don’t know what you are missing. They allow you to bury your ends neatly within the wadding in a very quick and easy way. I nearly always bury my ends in. Not always my starts, as you often go over the start point several times with a quilting design. Do buy good-quality ones as the cheaper ones can shred your threads and really do not work well.
Pins
Don’t get me started on those yellow-headed daggers they call quilting pins that are sold to unsuspecting beginners of our craft. I feel really sorry for people when they come to class feeling that they have bought the right thing and they don’t work well.
Pins for patchwork should be sharp, fine and flexible so that they do not buckle the fabric when inserted. Patchwork is all about accuracy and if you use a thick needle that causes the seam to move, you really are off to a bad start. Choose the best you can afford and look after them. They will serve you well for a long time to come.
Another funny thing with pins: why do we always put the blunt one back into the pin cushion? Toss it in the bin as soon as you find it — it will save you the frustration every time you come across it again.
Bobbins
I always use good-quality bobbins for my machines and I keep them separate from each other. I have found that some of the generic ones are not well made. I have wasted countless hours trying to fix a machine quilting issue that has come down to the wrong bobbin. You may have a couple of different machine brands and if they use their own style of bobbin, keep them with that machine. It will save tears later.
Another thing is that a poorly wound bobbin can cause many challenges when quilting, so make sure your bobbin is firm and evenly wound before you start.
Make this fussy-cut quilt by Michelle Bardwell
Threads
I could talk for hours about thread and I often do. Thread choice comes down to appropriateness of fibre and thickness. No one thread is good at everything. Here are a few suggestions for you:
Piecing: A fine 50-weight cotton thread that doesn’t bulk up the seam means your patchwork will be more accurate.
General machine quilting: My favourite is 40-weight as it gives good definition to the quilting. I also like to use a thread with a sheen; the sheen adds to the finished result of the quilting. The fibre choice can be polyester or cotton. I do not often use rayon as it breaks too easily.
Stitch in the ditch quilting and quilting around appliqué: This calls for a fine thread that disappears into the seams. A fine, matte, polyester thread that blends with the background colour of stitcheries and appliqué will really make your designs pop. If I am only doing a little stitch in the ditch I use my general machine quilting thread, but if there is a lot of it, I switch to the finer thread — it’s always worth the effort.
Another thing that is always worth the effort is to change your thread colour to blend well with your fabric choices. The amount of effort that goes into creating the patchwork is huge, so don’t scrimp on the time it takes to swap your quilting thread colours to match.
Quilting gloves
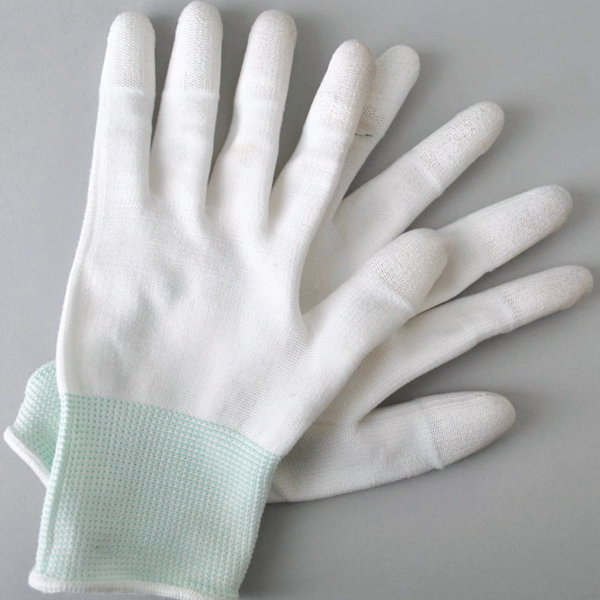
I love tight quilting gloves — they really help to manage big quilts and give grip to all your projects. If gloves are too loose, they move before the fabric does and do not give you as much control over your movements.
One frustration with gloves is that they need to be removed to change threads, or to rethread the needle. I get around this by cutting just the tip off the thumb and the index finger of the gloves on both hands. This frees your fingers to fiddle with the threads but still allows for good grip when quilting. I can always tell when someone has been to one of my classes by their chopped-off gloves.
Slippy mat
Using a slippy mat on the sewing machine bed allows the quilt sandwich to flow freely. This complements the quilting gloves — the gloves grip and stay with the quilt sandwich, while the slippy mat allows the quilt sandwich to slide easily. There are many brands out there that all work and are worth their weight in gold.
Spray baste
I really think that quilts, large or small, are much easier to quilt if they are spray basted. The spray holds the layers together everywhere, not just where the pin or thread would be in other methods used. You only need a light spray and it holds for a long time, which is generally as long as it takes to quilt your projects, and then washes out. Use a good-quality basting spray that doesn’t smell and adheres well to the batting and the fabric.
Three-metre measuring tape

Mine is in constant use and hangs around my neck so that I don’t put it down and lose it. So many patterns have measurements in metric and imperial. Using the trusty yellow tape measure means I can convert measurements quickly. I don’t often use it to measure pieces for patchwork as rulers and templates are more accurate than a tape that can stretch, but they are fantastic for measuring big quilts.
Patchwork rulers and templates
This is another huge topic that will be covered in more depth in a later article. For now let’s just say quality counts. Make sure you can read the lines and numbers clearly and build up a collection that helps you with the projects you like to do.
Here are the patchwork rulers I use the most; quilting rulers will be discussed next time.
12½in square, used every day for squaring off blocks and drawing up quilting designs
15½in square, a good large ruler that is a very useful size for larger cutting projects
6½in square, great for drawing up blocks for quilting
6½in x 24in, the essential long ruler
6½in x 12in, a good size for everyday use
Combine patchwork, appliqué and practicality in the Tulip Time Bag project
Rotary cutter and self-healing mat

My preferred size for general cutting is the 45mm rotary cutter. I also use an 18mm or 28mm occasionally for small, curvy things. Always replace your blade before you think you need to. We all know the feeling of a new blade. I keep an old cutter to use my worn blades to cut paper and template plastic.
I use a 34in x 22in cutting mat at home and I keep it flat and out of the sun so it doesn’t warp. When I am travelling, either to retreats for myself or to teach classes, I take a smaller one, or a mat that folds. There are mats out there that do not warp easily and these are best to take on the road. Always lie them flat in the car as they are easily ruined in hot cars. In Australia the heat is our enemy and our friend. As a friend, the sun can be used to warm up a warped mat that can then be weighed down by books to revive a flat surface.
Marking pens
If ever there was a subject I could wax lyrical on for hours it would be marking pens. Everyone has an opinion. Here is mine.
No matter what anyone says, always test your marker on the actual fabric you are using and be sure it comes out to your satisfaction. Manufacturers often make great claims about their products but at the end of the day, they do not know the fabric you are using or the additives that may have been incorporated in the production of that fabric. The list goes on. Test, test, test!
The best marker is the one that lasts just long enough to do your work and removes easily when you are done.
Some markers have rules to adhere to; blue water-soluble pens will set with heat, be that in a hot car or with a hot iron. However they are really useful when you have a lot of marking to do and you can wash the final project in cold water when it is finished.
The iron-off pens that are not designed with fabric in mind often leave a white shadow. I tend not to use them.
Chalk and ceramic pencils are really good if they show up on your work. They can usually be rubbed out after. Be wary of strong colours as they can stain a white fabric easily.
So again … test, test, test!
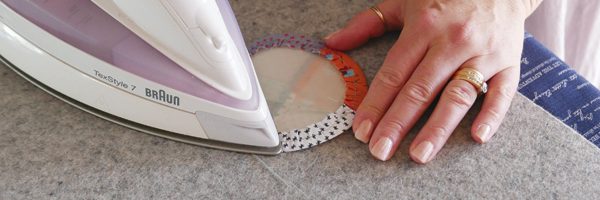
Iron and ironing pad
I always buy an iron that turns itself off after a time. They last so much longer and are much safer. I don’t tend to use an ironing board as they can be quite small — I prefer a large ironing mat that I can move around with me. Much more useful.
Craft this colourful round bag by Crystal McGann
Skirt hangers
Now we are getting to some of the household things that I use all the time. Skirt hangers are awesome. Quilts can be hung from curtain rails to be able to view the whole thing. You can use them to hang up a sheet or a piece of wadding to create a temporary design wall. Let’s face it, not everyone has room for a permanent design wall. My studio is beautifully light with lots of windows, but no walls to speak of. I hang everything from the curtain rails.
Last but by no means least, my camera
I am always taking photographs. On a recent trip to Europe I wore my camera out taking inspiration shots. I have so many ideas to come back to when I find the time to do something for me.
It’s not always the big stuff I use my camera for, though. Sometimes I take a photo of a quilting design I have been stitching out and have it on my iPad next to me when I am quilting. This means I can see the design I am repeating without having to find it on a big quilt.
Sometimes I use my phone camera for snaps, other times my fancy DSLR. It doesn’t matter as long as you are recording your ideas and inspiration for the future. Who knows — you might get to make a project out of them, or maybe it is just a collection of colours for inspiration. It is also useful to catalogue the images in a way that means something to you.
So there you go — a few of my favourite things that I use every day in my quilting. Maybe your favourite things are different to mine — just remember that you only need the things that allow you to work freely on your patchwork and quilting. Hey, you might be a gadget girl and that’s also ok. I bet you use all these things too.
Next issue I will introduce you to ruler quilting. It’s a hot topic at the moment and something I am very passionate about as a Westalee Design Quilting Educator.
Till then, happy quilting,
Anita