Quilting Advice from Deborah Louie: Top and Tail Feathers
Over the last three issues we have looked at free-motion quilting feathers. Currently I have shown you Open feathers, Formal feathers and Hook feathers — all different and beautiful in their own way. In this issue we are delving into the Top and Tail feather.
I hope you have had some fun free-motion quilting along with me in these articles as I have given step-by-step instructions. One thing to remember is that when it comes to free-motion quilting, no matter how experienced you are, for sit-down quilters on domestic machines, your quilting will, and should be, different to others. It’s like hand writing; everyone has their own style. Embrace this individuality — you won’t quilt like me or anyone else, nor should you. Have fun finding your own style and, most importantly, relax, drop your shoulders and enjoy your time on the sewing machine.
The Top and Tail feather is perfect for large feather designs as the backtracking is limited. This style of feather is very popular with stand-up, long arm quilters where they can get beautiful long sweeping plumes without going back over the joining arm of the feathers. As with all free-motion quilting, there are many ways to stitch any pattern. I will concentrate on one style of Top and Tail feather in this article.
As I will be explaining quilting on a domestic machine, our area of quilting smoothly in one fluid motion is limited to the free arm quilting space on your sewing machine. I have a Bernina 770 which has 10 inches of wonderful quilting space. The Bernina Q20 has 20 inches of amazing quilting area so flumes can be much larger. So working with your sewing machine, not against it, will really help you understand. By this I mean if you only have say six inches of sewing space between needle and the side of your machine, work to a smaller scale. Don’t try to do huge plumes; stitch so you are comfortable and not stressed.
Machine set-up for free-motion quilting
To set up your sewing machine to successfully free-motion quilt, follow these guidelines:
- Open-toe free-motion foot on the machine
- Feed dogs disengaged (dropped)
- Stitch length to 0
- 50-weight cotton thread in the bobbin
- I have used 40-weight Mettler Polysheen thread in the top for all my samples as it is a flat, shiny, strong thread that does not build up when backtracking
- A new top-stitch size-80 needle
- A scrap fabric with batting for warming up on before you start the project
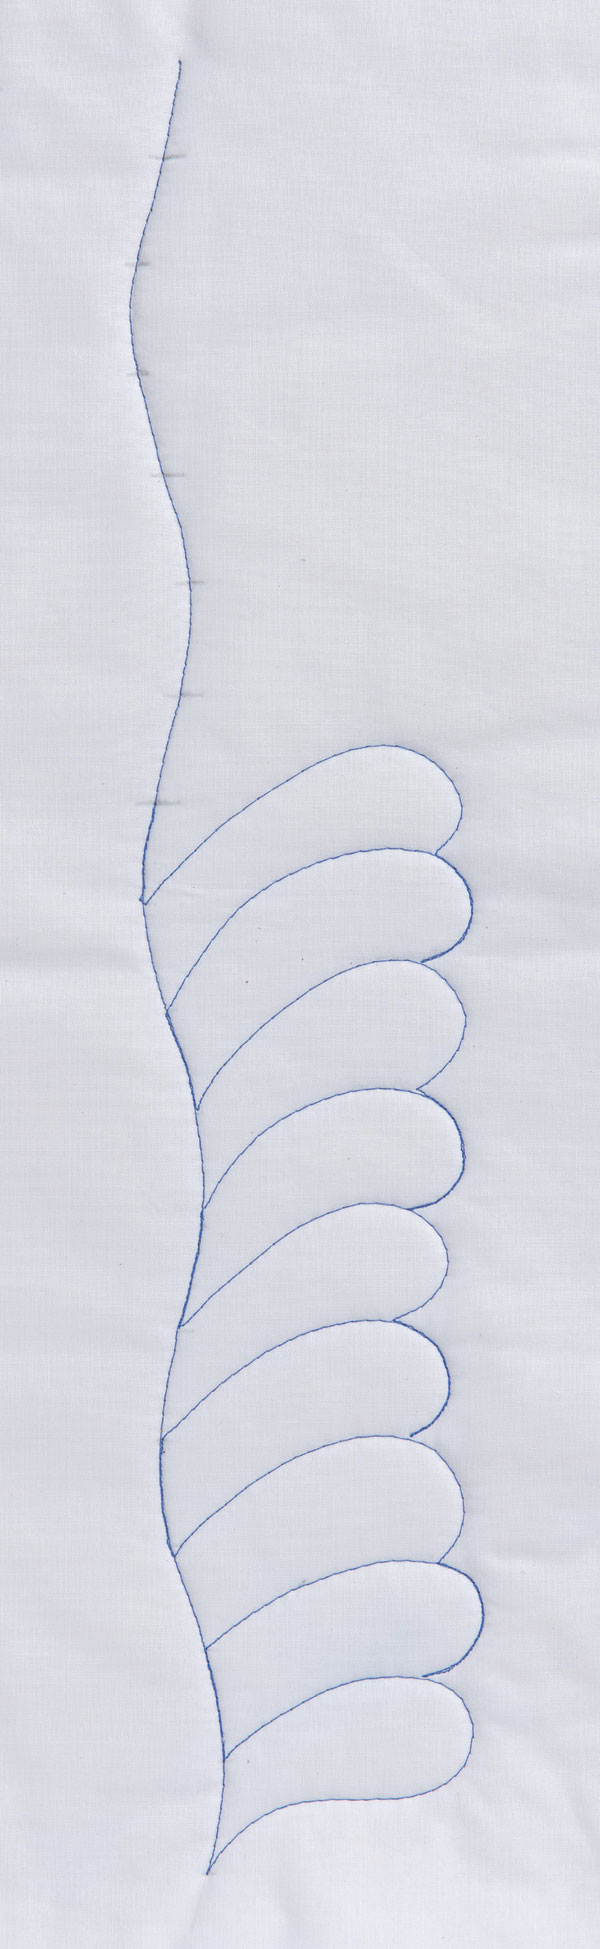
How to quilt a Top and Tail feather
As with all other styles of feathers, I like to stitch the centre spine first by marking with a curved ruler and an F pencil, a centre spine, then add a one-inch mark all the way down.
We start to stitch the centre spine from top to bottom. To do this, bring up the bobbin thread to the top by placing the darning foot down on the fabric, needle down and up and pull the fabric towards yourself a little. Take the loop and pull till single thread only. Place the top and bobbin thread behind your free-motion foot, darning foot down again on the fabric and stitch a few small stitches while still holding on to the threads.
If you can adjust the machine speed, slide the speed down to slow/medium speed and stitch now from the top to the bottom of the spine line, working with slow hands and stopping with the needle down in the fabric every three inches or so. When you reach the bottom it’s time to work on one side only and curve up and around for the first plume, stopping only at the spine one-inch mark, needle down.
Now backtrack (stitching on top of the line of the spine) up to the next one-inch mark and stop.
Quilt only the top of the next feather mirroring the arch shape below, till you just touch the feather underneath, then backtrack over the end of this feather and stop.
Next we jump off that feather to make a new feather on top of the previous feather, backtracking the spine again to move up and create another feather on top of the previous one.
You can see every second plume is backtracked at the end and at the spine. Please have a look at the simple quilted Sample 1.
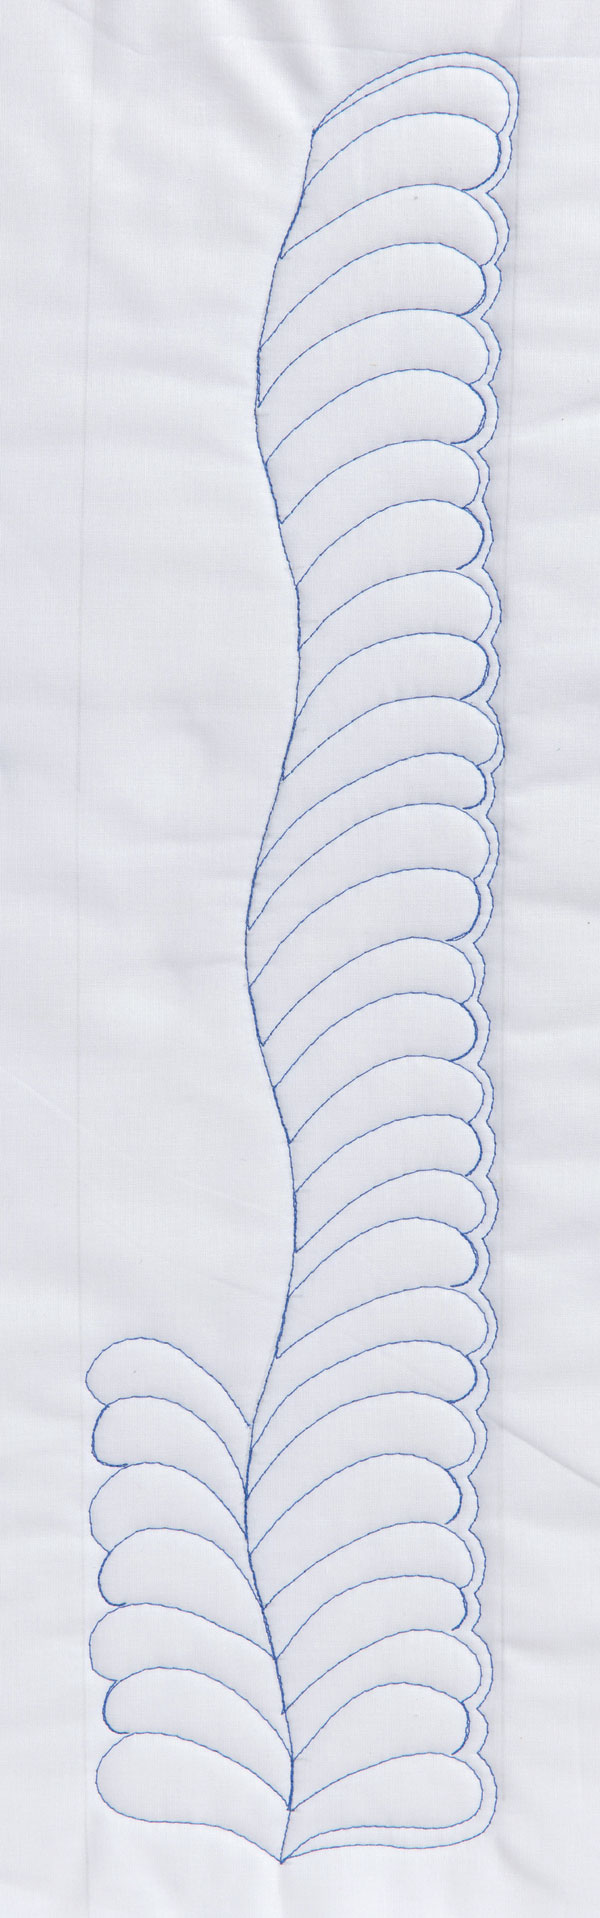
The next quilted sample, Sample 2, is where I was after thinner plumes so the marking is half-inch down the spine. I quilted this bottom to top and once at the top, shadow quilted one line all the way down. This deviates the eye away from the every-second backtrack heavier line on the ends. Once again at the bottom, quilt the feathers to the top and shadow back down again for an even look. Simple.
Create Megan Manwaring’s bright, bold and modern quilt
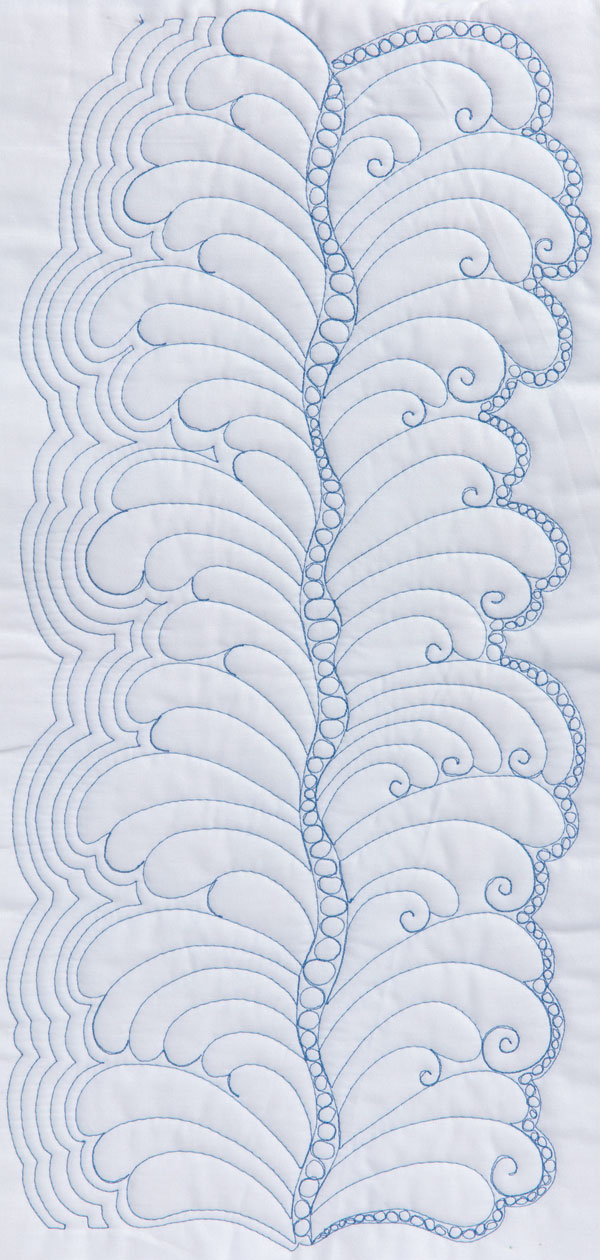
It is a lot of fun not to have the size of the individual feathers all the same. Vary the length as I have quilted on the left-hand side in Sample 3. There are some long feathers there with small and a few rows of echoing on the side to create movement.
On the right-hand side I decided to curl, then jump off the feather, making a sweet curly swirl that suits the backtracking nicely. I did not stress out if my lines were not on top of each other all the time. Remember that unique style look. When I reached the top with the feathers, I shadowed down again to the bottom and filled the space with small pebbles, working back to the top again. Then I decided to fill the centre spine with pebbles as well. So there was lots going on and the backtracking was not at all noticeable now.
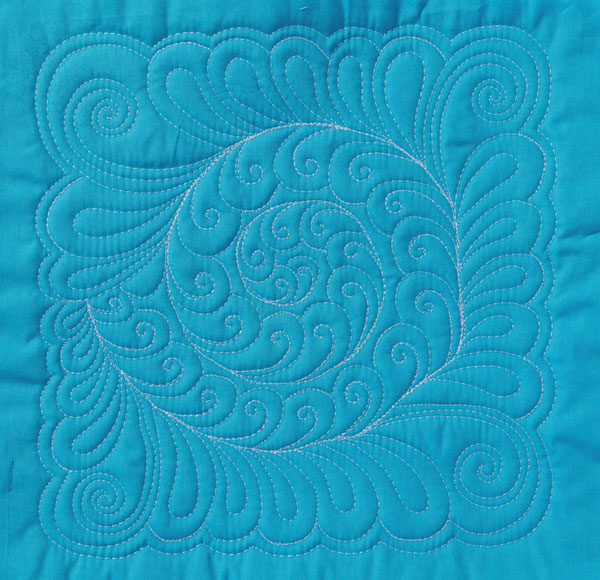
Creating an all-over Top and Tail feather design
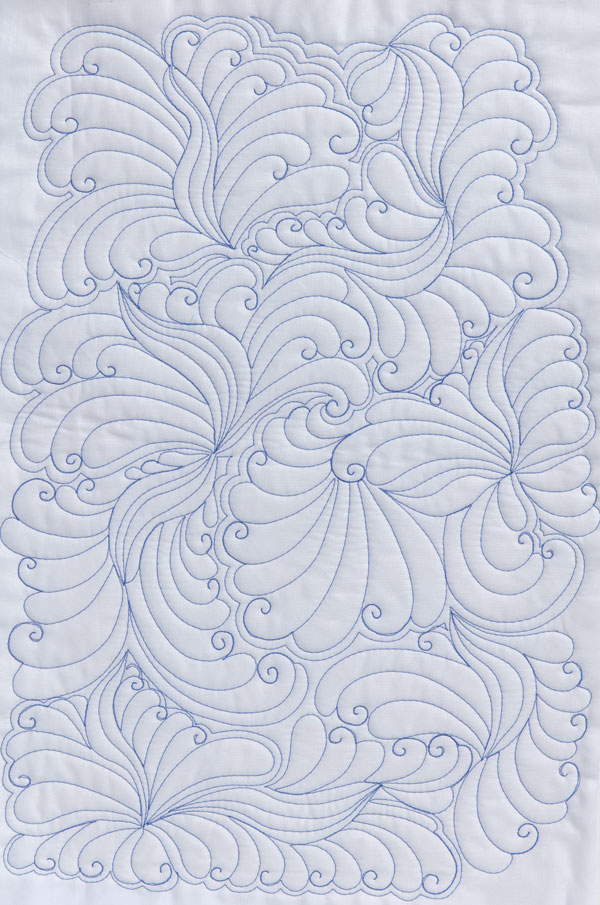
I went on to experiment and had a lot of fun creating a large all-over pattern on Sample 4 with this Top and Tail feather design and echo quilting combination. First, I stitched a soft long curve about three inches long, then echoed this line three times. Quilting the feathers next, as with the other samples, I worked bottom to top again, stitching the Top and Tail feathers. I then added a shadow line around that one side, down to the bottom again, to allow me to work the opposite side and echo back down. Then I started over and took the soft curved line to another direction and continued as previously. You see the initial shape has been changed, but the routine of feathers top to bottom and shadow back down to the bottom again is the same. With any small left-over space, just echo quilt inside.
It might take some time to get the right feel, but persevere — never give up and you will get your feather groove.
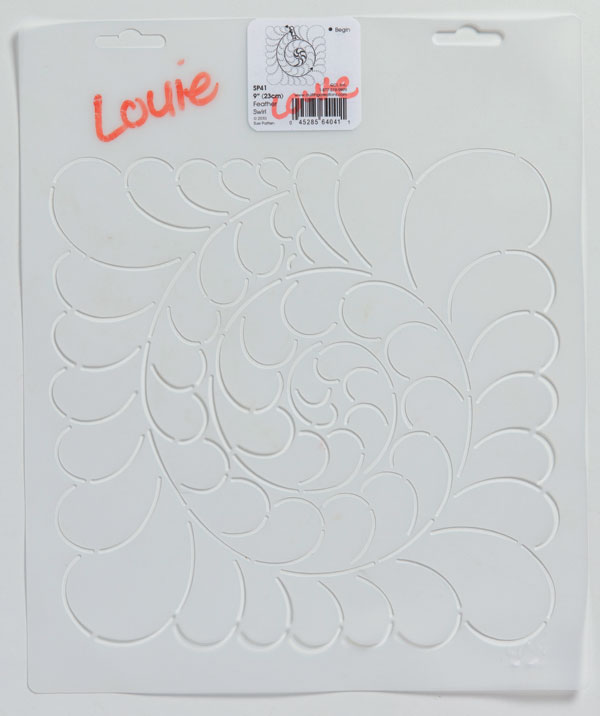
If you are not comfortable with free form, why not try a commercial stencil. I am a huge lover of stencils — they really help you feel comfortable when free-motion quilting but they are another important skill level to master. I am developing my own designer range of stencils, so please watch my website for exciting innovative designs and grids soon.
On the blue Sample 5, I transferred the stencil design with an F pencil to the fabric. I quilted the shapes using the same Top and Tail feather method, but I did not find the design was interesting enough for me. So I expanded on the design, added loops and curls, and now the top backtracking is not at all visible. This now is a unique feather spiral design which would look great in a solid fabric 10-inch block quilt.
Learn Curved Piecing with Margaret McDonald
So that is Top and Tail feathers! Have fun making your own version.
Happy quilting,
X Deb
If you would like to know more, visit my website: www.deborahlouie.com.au